How to Crochet Kirby Amigurumi For Gift-Giving

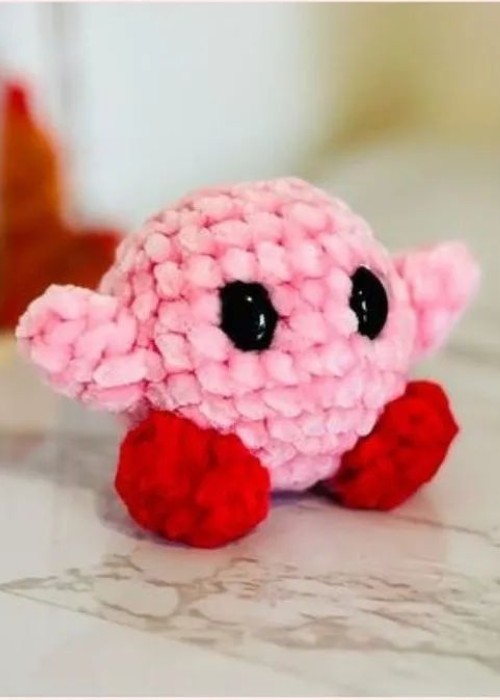
Crochet Kirby is simply adorable, extra soft and huggable. So, try this pattern if you want to crochet one for your little one. Our Kirby amigurumi in same red and pink color will be squishy and shiny due to the use of velvety yarn and comes with minimal details. It can be the loveliest keychain, bag charm or simply a member of a crochet toy family. In this post, you will learn every detail, whether the material needs, techniques, or the complete pattern.
Designer: nakukibo.crochet On Instagram
Supplies (Recommended by the designer)
The designer of this crochet Kirby has recommended the following crochet supplies. However, you are free to choose your choices, too.
- Pink velvet/chenille yarn, 3-4mm (NICEEC) and Red velvet/chenille yarn, 3-4mm (NICEEC)
- Crochet Hook (not specified by the designer but you can use the 6mm yarn)
- Scissors
- Needle
- Stuffing
- Oval safety eyes, 10mm x 14mm
Techniques
Make sure you know how to crochet or perform the below crochet stitches and the techniques:
- Magic Ring
- Single crochet (US)
- Chain
- Increasing stitch
- Decreasing stitch
- Working in Front Loop Only
- Slip Stitch
- Weaving in the ends
Crochet Kirby Pattern
Are you ready to learn how to crochet Kirby amigurumi for gifting to your baby? Follow through the crochet instructions written in the pattern below:
Abbreviations
For following through the instructions written in this pattern, read out this list to understand the meaning of each instruction as abbreviation:
- R#: round/row number
- mc: magic circle
- slip: slip stitch
- ch: chain
- sc: single crochet
- inc: increase stitch
- dec: decrease stitch
- fo: fasten off
- <>: do steps in parenthesis into same stitch
- (#): number of stitches at the end
- (.)x#: do steps in parenthesis # times
BODY
R1: 6sc in mc (6)
R2: (inc) x 6 (12)
R3: (sc, inc) x 6 (18)
R4: (sc, inc, sc) x 6 (24)
R5: (sc, sc, sc, inc) x 6 (30) R6-9:30 sc (30)
R10: (sc, sc, sc, dec) x 6 (24)
add the safety eyes between R7-R8
start adding the padding
R11: (sc, dec, sc) x 6 (18)
R12: (sc, dec) x 6 (12)
finish adding the stuffing
R13: (dec) x 6 (6) then fo
•
hide the yarn tail through the body
SMALL PARTS
Arm, make 2 (pink)
R1: 4 sc into mc (4)
R2: (sc, inc) x 2 (6)
R3: 6 sc (6)
Feet, make 2 (red)
R1: Ch 4 (4)
R2: Starting from 2nd ch from hook, sc 6 around (6)
R3: (sc, inc, sc) x 2 (8)
R4: (sc, dec, sc) x2 (6)
ASSEMBLE
Arms
· Attach the arms between R6-R8 on each side
Feet
Attach the feet between R10-R12 on each side, roughly lined up with the arms.


