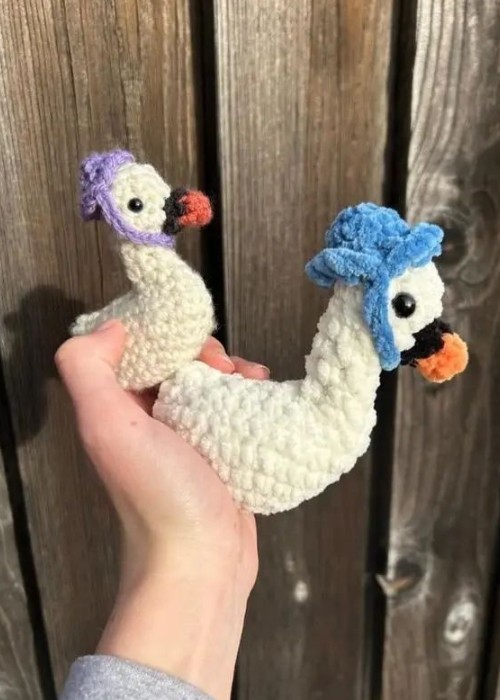
How to Crochet Chunky Swan Amigurumi For Gifting to Kids
Learn how to crochet swan amigurumi in a minimalistic art style and adorable hats following this pattern. It lacks legs because you would use it as a hanging decoration. Due to the use of velvety yarn, it is extremely soft and squishy. Gift it to your little one this summer to enjoy the lake visits hugging these swans.
Supplies Needed
Gather these supplies (tools and materials) to crochet this chunky swan (bird) amigurumi.
- Chunky cotton or acrylic yarn in white, black, orange, and a color for the hat (The designer used parfait chunky but is currently out of stock)
- Scissors
- Crochet hook (I used 5.5 mm)
- Needle
- Safety eyes
- Stitch markers
- Stuffing (Polyester fiberfill )
Techniques Needed
The following crochet techniques are a must for crocheting this swan amigurumi. The difficulty of which can be learned by following the links in the list:
- Magic Ring
- Single crochet
- Chain Stitch
- Increasing
- Decreasing
- Working in Front Loop Only
- Slip Stitch
- Weaving in the ends
Crochet Chunky Swan Pattern
Are you in a learning mood? Grab the crochet hook and follow through the below crochet chunky swan pattern for all skill levels:
Abbreviations Used
While following this crochet pattern, you will tackle the following crochet abbreviations. Make sure you read the list to understand what the instructions say:
- mr – magic ring
- sc – single crochet
- ch – chain
- inc – increase
- dec – decrease
- FLO – front loop only
- sl st – slip stitch
- fo – fasten off
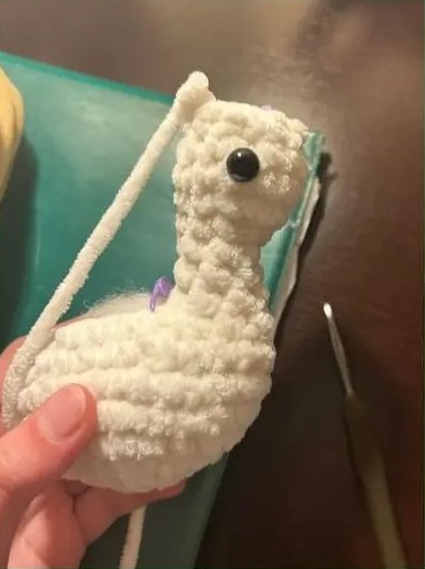
BODY
starting with white…
R1 – 6 sc in mr [6]
R2 – inc x 6 [12]
R3 – (sc, inc) x 6 [18]
R4 – (2 sc, inc) x 6 [24]
R5 – sc around [24]
R6 – (3 sc, inc) x 6 [30]
R7 – sc around [30]
R8 – (3 sc, dec) x 6 [24]
R9 – (2 sc, dec) x 6 [18]
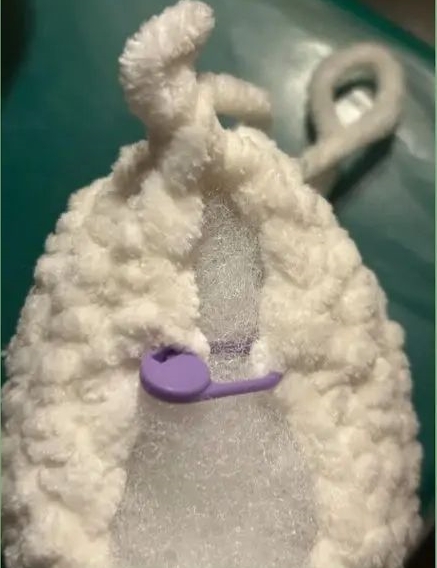
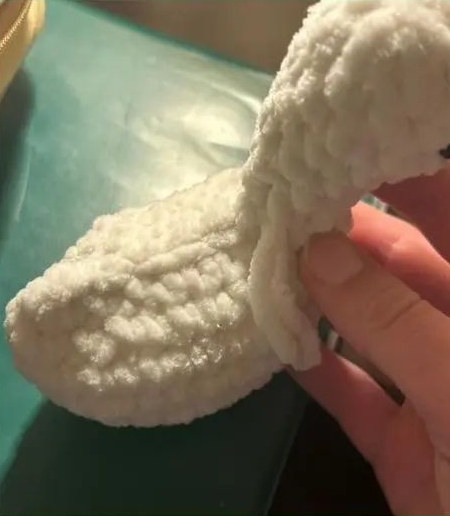
MAKING THE NECK
this is what the 3 stitches on either side should look like
1. remove your current stitch marker
2. use a stitch marker to separate the neck and body by having 6 stitches on 1 side, and 12 on the other (including stitch
marker)
3. neck: make sure there are 3 stitches between the working yarn and the stitch marker on either side. this ensures that you will have your head inc’s in the right spot. you will NOT being crocheting into the stitch marker, it will be whipped stitched through after you finish the neck & head.
NECK & HEAD
continuing with the working yarn…
R1-R3 – sc around [6] placing a stitch marker after the first sc (3 rounds)
stuff
R4-2 inc, 4 sc [8]
R5 – 4 inc, 4 sc [12]
R6-R7 – sc around [12] (2 rounds)
R8 – (sc, dec) x 4 [8]
place eyes between rounds 6 & 7 of the neck/head, with 5 stitches in between
stuff
R9-(2 sc, dec) x 2 [6] finish stuffing
fo and sew hole closed
BEAK
starting with orange… R1 – 4 sc in mr [4]
R2 – sc around [4] color change to black R3-(sc, inc) x 2 [6]
fo and leave a tail for sewing stuff lightly and sew between
rounds 4-7, in between the
eyes
CLOSING THE BACK
1. attach your white yarn to one of the sc’s with the stitch
marker and whip stitch across to sew the back closed
i like to go back and whip stitch again in the opposite direction just to be safe! 2. cut & weave in ends
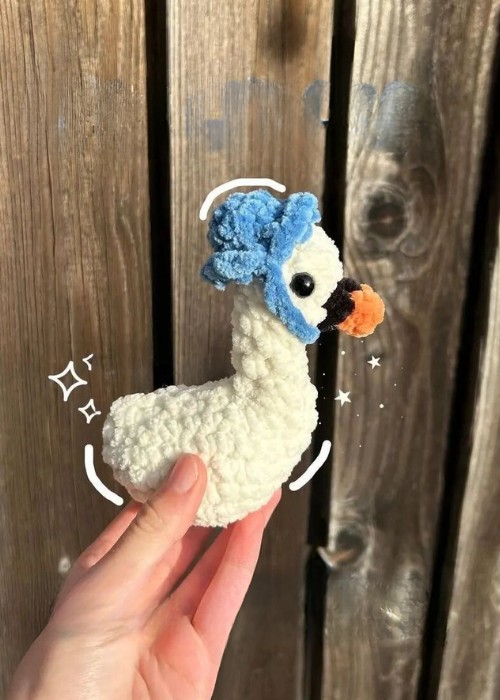
Hat
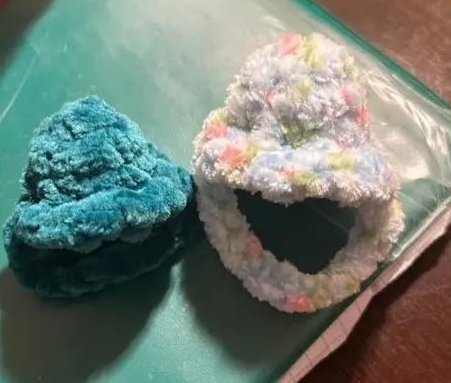
R1 – 6 sc in mr [6] R2 (sc, inc) x 3 [9]
–
R3 – sc around [9] R4 – FLO: inc x 9 [18] sl st in next stitch and ch 11 sl st in the stitch directely across from the ch and fo weave in ends and put the hat on the goose!