How to Crochet Retro Daisy Square (SIMPLIFIED Tutorial)

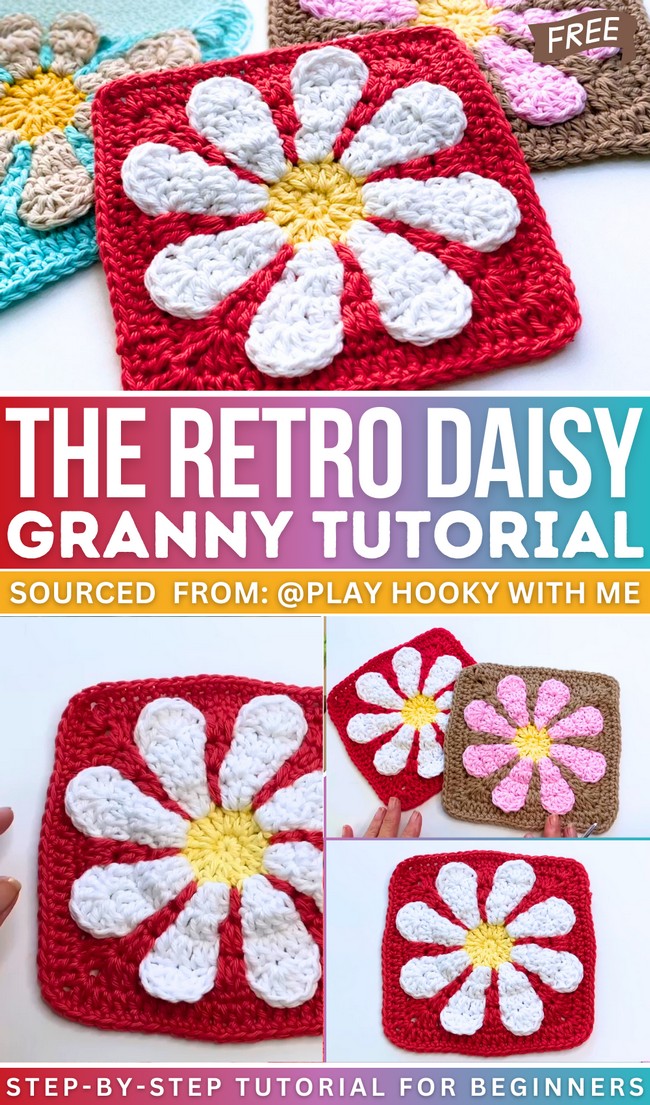
The Crochet Retro Daisy Square is a popular granny variation that most people find a bit difficult. So, in this post, we have brought a very simplified tutorial on how to crochet a retro daisy square from Play Hooky with Me.
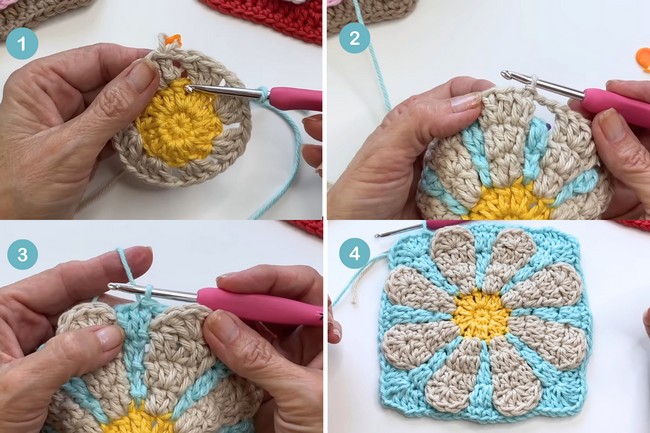
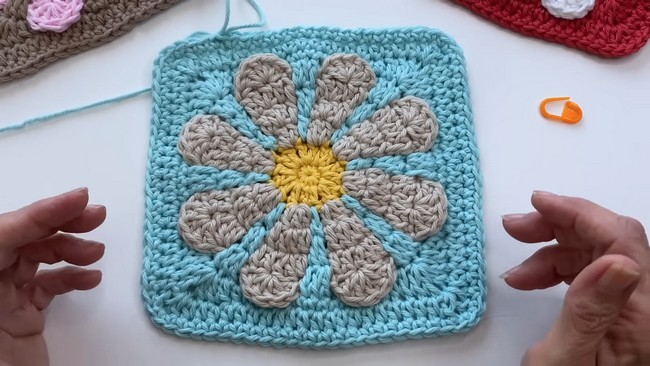
This square features cute daisy-like petals at its center, surrounded by a colorful background that can be made using a simpler method shared by the video creator.
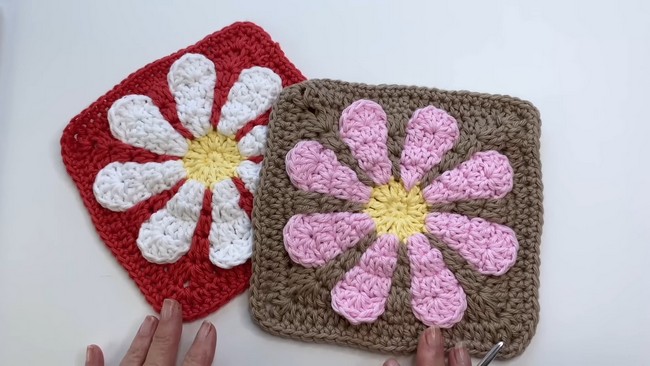
While it might look complex, it’s easier than you think, which makes it suitable for those at a beginner to intermediate level. The square measures approximately six and a half inches. The tutor shares three different popular color combos that you should definitely try.
It’s versatile and big and therefore can be used for blankets, pillow covers, or even bags. You can find the complete video guide for crocheting this granny square at the end of this post. Read more to get deeper insights about it.
Skills Used: Magic rings, single and double crochets, and working in rounds. It also demonstrates forming clusters, chain spacing, and constructing corners to turn a circular motif into a square.
Advanced skills like using two colors seamlessly in each round and crocheting uniform petals for the daisy ensure a balanced and polished result. The border techniques help tie the design together.
Personalization Tips: All these squares feature the same daisy center except for the background color which you can easily customize by choosing from red, blue, and brown.
You can modify the petal count or size to achieve a different flower style, like sunflowers. or functional customization, adjust the square’s size by adding more border rounds or using a larger hook and yarn.

This tutorial is a comprehensive guide for crocheting a retro daisy flower square for all those who consider it an intimidating task. Although it is non-reversible worth crocheting. The tutor emphasizes beginner-friendly techniques while providing options for customization in size and color. The step-by-step instructions ensure an enjoyable and satisfying project.
Free Crochet Daisy Flower Square Pattern
Materials
- Worsted weight cotton yarn (or preferred yarn) in:
- Yellow or center color (daisy center)
- White or petal color
- Background color (your choice)
- 4.0 mm crochet hook
- Tapestry/yarn needle (for weaving in ends)
- Scissors
- Stitch marker (optional, for holding working loops)
Key Abbreviations
| Abbreviation | Meaning |
|---|---|
| MR | Magic ring |
| ch | Chain |
| sc | Single crochet |
| hdc | Half double crochet |
| dc | Double crochet |
| sl st | Slip stitch |
| st(s) | Stitch(es) |
| tr | Treble crochet |
| inc | Increase (two sts in same st) |
Special Notes
- Finished square is approximately 6.5″ x 6.5″ (varies by yarn and tension).
- Rounds are worked in the “drop and pick up” method for color changes—no need to fasten off between petal and background colors.
- Each petal round gets wider by increasing within petals.
- Corners and final shaping form a traditional square that can be joined to others.
Pattern
Center (Round 1, Daisy Center Color)
- Make a MR (or ch 4, sl st to form ring).
- Ch 1 to secure ring.
- Work 8 sc in ring.
- Pull tail tight to close center.
- Sl st to first sc.
- Fasten off.
Rnd 2 (Still Center Color)
- Attach yarn in any sc.
- Ch 2 or 3 (counts as first dc).
- Work 1 dc in same st (if ch-2) / next st (if ch-3).
- Work 2 dc in each st around. (Total: 16 dc.)
- Sl st to first true dc (not to the chain).
- Fasten off.
Round 3 (Petal Color)
- Attach petal color with a standing dc or sl st + ch 2/3 in any stitch.
- Work 2 dc in the same st. (3 dc forms petal base.)
- Ch 1, skip next st; 3 dc in next st.
- Repeat: [Ch 1, skip 1 st, 3 dc in next st] around—total of 8 petals.
- At end, ch 1, sl st to first true dc of the round.
- Do NOT fasten off: Make a long loop or use a stitch marker.
Round 3 (Background Color)
- Join new color with a sl knot.
- Work into Round 2 stitches (between petals), bending petals forward.
- Attach with sl st in a dc from Round 2 (behind petal).
- Ch 2/3 (counts as first dc).
- [Ch 4, dc in next space between petals (always into R2 st, not through the ch-sps)]. Repeat around.
- Sl st to top of initial ch.
- Do NOT fasten off. Secure loop (marker/long loop).
4 (Petal Color)
- Bring petal color loop to front.
- Ch 2/3 (first dc), dc in next st.
- Inc in next st (2 dc in same st), dc in next st (4 dc per petal).
- Ch 2, move to next petal and repeat sequence:
- [dc in 1st, inc in 2nd, dc in 3rd st of next petal], ch 2.
- After last petal, ch 2, sl st to first dc of round.
- Do NOT fasten off.
4 (Background Color)
- Bring background color to working position.
- Ch 2/3, dc in same st (increase)—2 dc into each background color segment of previous round.
- Ch 5, move to next background space—work 2 dc in background st.
- Continue: [2 dc in background st, ch 5] around.
- Sl st to initial dc. Do NOT fasten off.
5 (Petal Color) – Last Petal Increase
- Bring petal color to front.
- Ch 2/3 (first dc), dc in next st, inc in next st (2 dc), dc in last st (5 dc per petal).
- Ch 2 and repeat in each petal.
- After last petal, ch 2, sl st to first dc.
- Continue with petal color (do not switch yet).
Petal Tips:
6. Work into the 3rd (middle) dc of each 5-dc petal:
a. 5 dc in the middle dc (shell),
b. Sl st to the last dc of that petal to anchor the tip,
c. Ch 2, sl st in first dc of next petal, 5 dc in middle dc (shell).
d. Repeat for each petal tip.
- After the last tip, ch 2, sl st to the initial sl st.
- Fasten off petal color.
Rnd 5 (Background Color) – Square Begins
- Bring working loop of background color forward.
- Ch 2/3 (counts as dc), 2 dc in next st (inc for 3 dc total).
- In the next back chain (behind petal),
- Work 5 dc in chain, optionally tacking petal by yarning over through chain and petal tip anchoring spot.
- Next, work 3 dc as before (dc in 1 st, inc in next), then 5 dc in ch.
- Repeat around, sl st to first dc at end.
6 (Corners & Sides, Square Formation)
- Ch 2/3 (first dc) in first st, dc in next.
- In central dc (of 3-dc group), work [2 dc, ch 2, 2 dc] (corner made), dc in next st.
- For next side: hdc in next st; sc in next 11; hdc in next.
- Repeat:
- **[dc in first st, corner in next st, dc in third],
- hdc, sc x11, hdc** on each side.
- Sl st to first st at end of round.
7 (Square Edge)
- Ch 2 (counts as first hdc).
- Hdc in each st to corner.
- At corner, [dc, ch 1, dc] in ch-2 corner space.
- Continue with hdc in each st across each side and repeat corners.
- Sl st to first hdc at round end.
(Aim: Sides should be 21 hdc each. Adjust if needed for your tension.)
8 (Optional Final Border)
- Ch 1, sc in every st around.
- In each corner ch-1 space, work 1 sc.
- If joining to other squares, adjust stitch count as necessary to match other squares.
- Sl st to first sc. Fasten off.
Conclusion
- Your Retro Daisy Flower Square is complete!
- This vibrant, dimensional square is ideal for blankets, bags, and retro-inspired projects.
- Final border rounds can help match squares for modular assembly.
Pattern Corrections
- Ensure stitch counts match at each stage for symmetry.
- Petal increases always go in a different spot each round for a fuller petal (anywhere within petal works).
- Chain counts for background (first ch-4, then ch-5, etc.) may be adjusted for tension and squareness.
Tips
- Weave in ends after petal rounds for a tidy finish.
- Use stitch markers for color loops if needed.
- Block your squares for perfect alignment if assembling many together.
- Tack petals down as described if you prefer less 3D effect.