Free Crochet Phone Cable Organizer Pattern – Tidy Your Tech

Tame your tangled cords with our free crochet phone cable organizer pattern a stylish and practical project that keeps your cables neat and accessible.
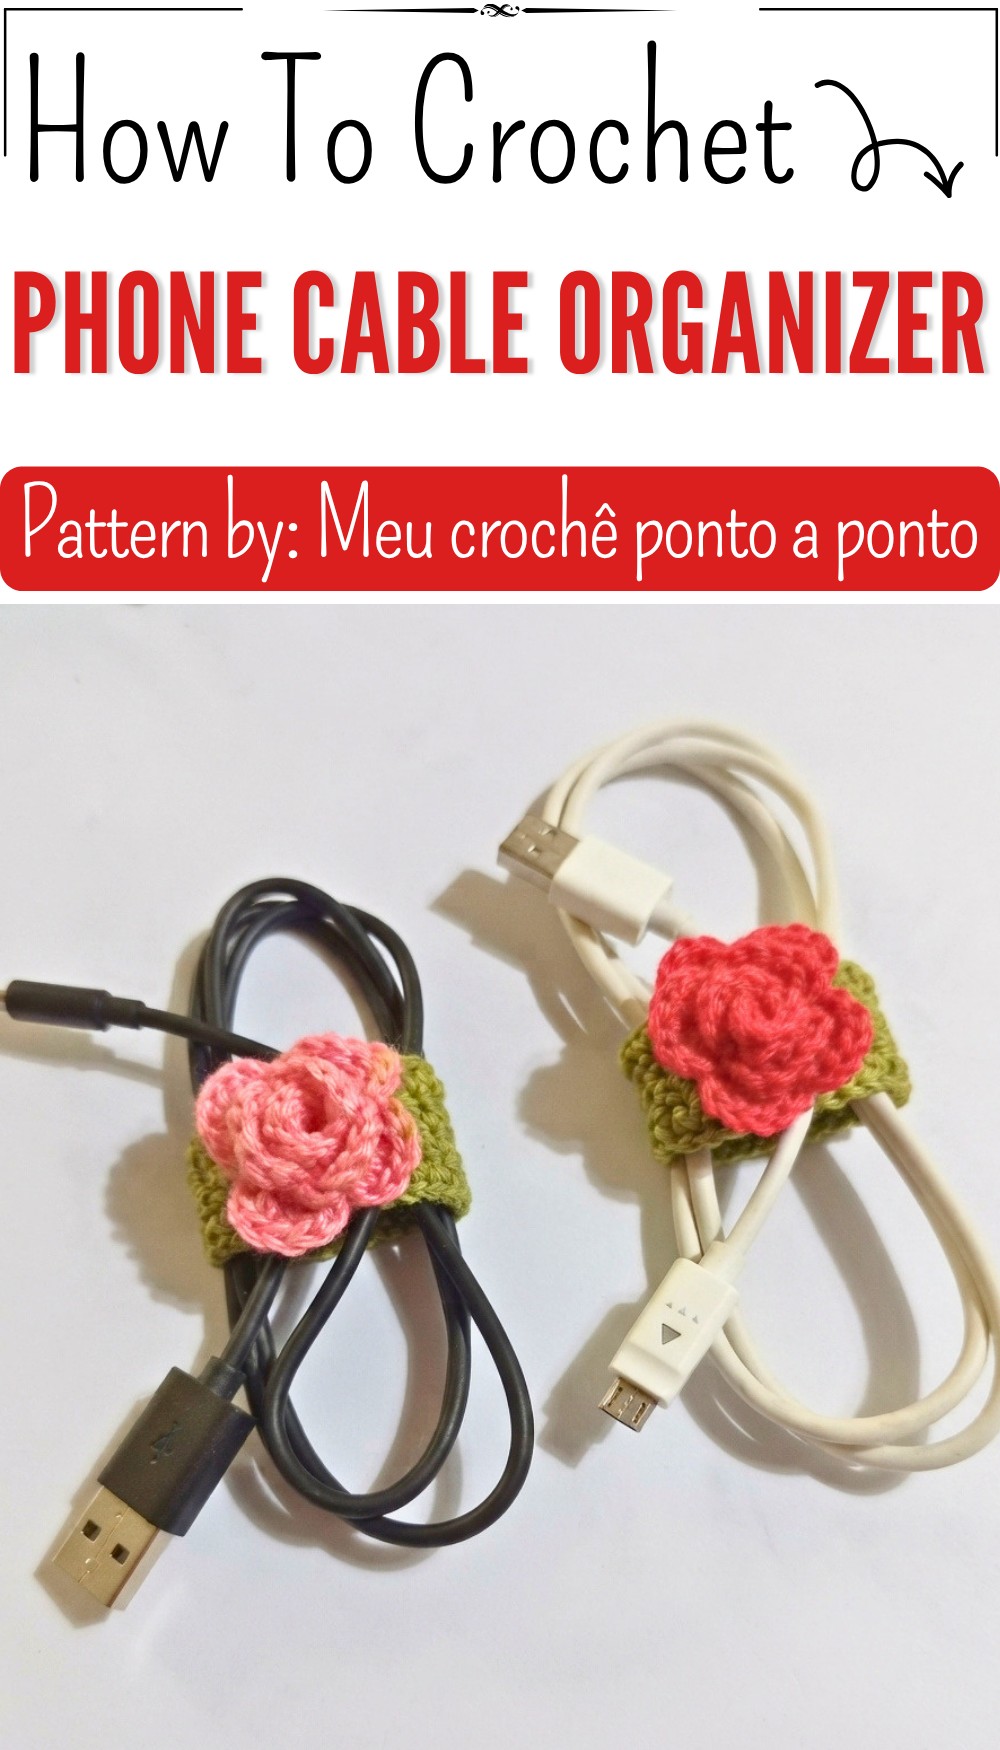
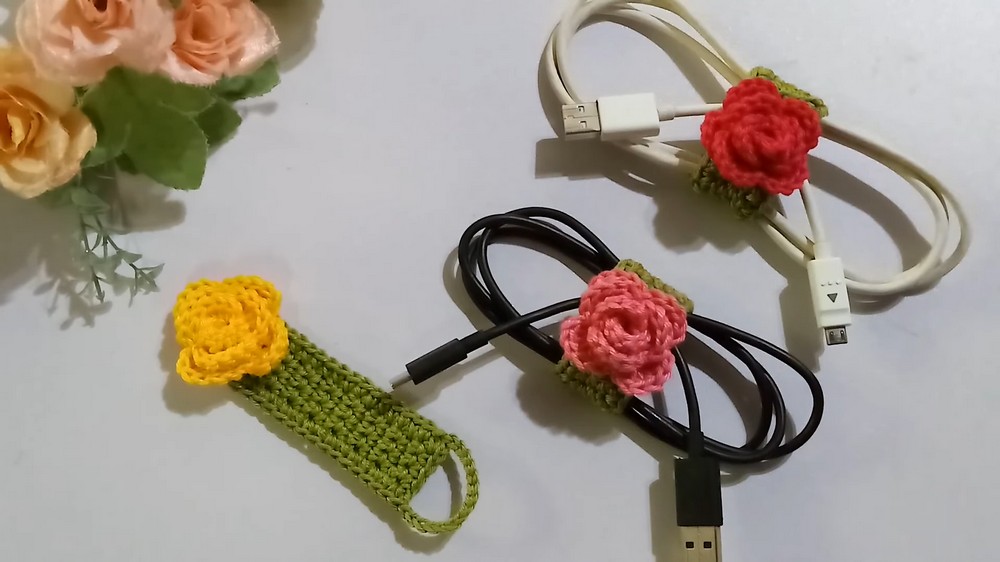
This small, charming organizer looks like a neat and colorful band with a delicate flower on top, perfect for keeping cables tidy and adding beauty to everyday items. The Meu crochê ponto a ponto channel has shared a simple and clear way to make this accessory that combines the colors bubblegum pink and pistachio green, creating a fresh and attractive look. Its soft texture and careful finishing make it both useful and pleasant to touch, adding a joyful detail wherever it is used.
Free Crochet Phone Cable Organizer Pattern – Keep Your Cables Neat

The main purpose of this piece is to keep phone or headphone cables from tangling, making storage and transport easier and more convenient. Beyond organization, it adds a decorative touch to bags, desks, or any area where cables tend to get lost or messy. The flower detail on top is created with loops and stitches that form elegant petals, making the organizer look like a little rose, which is the most eye-catching part of its shape.
One of the best qualities is how quickly it can be made using just a few materials while allowing adjustments in size to fit different cables. Its simple but thoughtful design lets it function well without being bulky, making it a great companion for daily use.
Crochet Cable Organizer Pattern
This crochet cable organizer is a practical and attractive accessory created to neatly store cell phone charging cables or headphones. Designed with simple textures and a beautiful rose decoration, this piece is both functional and decorative. Its compact size and well-thought-out design make it perfect for beginners or intermediate crocheters looking to make quick and fun projects.
Skill Level
Beginner
Materials
To create this crochet cable organizer, you will need:
- Yarn:
- Bubblegum pink Amigurumi yarn: For the decorative rose.
- Pistachio green Amigurumi yarn: For the base of the organizer.
- Crochet Hook: 1.5mm hook.
- Scissors: For clean yarn trimming.
- Sewing Needle: For sewing and securing yarn ends or rose attachment.
- Hot Glue Gun: Optional, for attaching the rose to the main base.
- Optional Tools: Stitch marker if needed for tracking stitches and rows.
Special Stitches
This pattern uses simple crochet stitches suitable for beginners:
- Slip Knot: Used to begin crocheting a piece with a secure starting loop.
- Chain (ch): Yarn over and pull through the loop to create a series of chain stitches.
- Single Crochet (sc): Insert hook into stitch, yarn over, pull up a loop (two loops on hook), yarn over again and pull through both loops.
- Slip Stitch (sl st): Insert hook into stitch, yarn over, and pull through both the stitch and the loop on the hook.
- Double Crochet (dc): Yarn over, insert hook into stitch. Yarn over again and pull through two loops repeatedly until only one loop remains on the hook (used in the rose motif).
Stitch Abbreviations
- ch = Chain
- sc = Single Crochet
- sl st = Slip Stitch
- dc = Double Crochet
Useful Tips
- To ensure clean and professional edges, keep your tension consistent throughout the project.
- When working the rose petals, focus on identifying the correct loops to avoid errors while completing the double crochets.
- For extra durability, sew the rose securely onto the base, even if you plan to glue it.
Detailed Pattern Instructions
Part 1: Cable Organizer Base
Foundation & Rows 1–20:
- Using pistachio green yarn and a 1.50mm crochet hook, start with a slip knot.
- Chain 5 stitches.

Row 1:
- Skip the first chain stitch from the hook.
- Insert the hook into the second chain and work 1 single crochet (sc).
- Work 1 sc in each of the remaining chain stitches. You should now have 4 single crochet stitches.
Row 2–20:
- Chain 1 and turn your work.
- Work 1 sc in each of the 4 stitches.
- Repeat this same pattern for 20 rows, keeping your tension consistent.

- Note: Adjust the number of rows if you want the organizer to be bigger or smaller.
Edging:
- Chain 1 and rotate the piece so you can start working on the side edges.
- Work 1 slip stitch (sl st) at the beginning of each row along the side of the base. Keep working slip stitches evenly along the first edge.
Corners:
- When you reach a corner, work 2 single crochet stitches (sc) into the same stitch to create a smooth turn.
- Continue working 1 sc into each existing stitch along the bottom edge.
Second Corner:
- At the next corner, work 2 sc in the same stitch again.
Second Side Edge:
- Work 1 sc into the first stitch of each row along the second side edge until you reach the final corner.
Final Corner:
- At the last corner, work 1 sc.
- Finish off by creating 15 chain stitches.

Closure Loop:
- After chaining 15 stitches, insert your hook into the opposite corner and work 1 slip stitch (sl st) to secure the loop in place. Cut the yarn and weave in the ends.
This completes the base of the cable organizer!
Part 2: Decorative Rose
Foundation:
- Using bubblegum pink yarn, start with a slip knot.
- Chain 4 stitches.

Petal Base:
- Yarn over twice to create loops on the needle.
- Insert the hook into the first chain stitch and pull up to make a double treble crochet (2 loops at a time).
- Chain 4 stitches again.

Petal Loops:
- Repeat the sequence of chain 4, followed by double treble crochet, where each stitch is worked into the loops from the previous step.
- Continue until you have formed 9 petal loops.
Working the Rose Shape:
Row 1:
- Turn the piece to begin curling the rose from the first loop.
- Work 5 double crochets (dc) into the first loop.
- At the center of the loop, insert your hook into its base and work 1 slip stitch (sl st) to secure.
Row 2:
- Move to the next loop and work 5 dc.
- Repeat the steps of crocheting 5 dc and securing each loop with 1 sl st, continuing across the petals.
Final Row:
- At the last loop, work 5 dc and secure the thread with 1 sl st. Leave a small tail for sewing, knot the loose ends, and trim the excess.

Rolling and Shaping the Rose:
- Roll the rose gently starting from the outer edge to form a spiral shape.
- Use a sewing needle to securely stitch through all layers at the base of the rose. Alternatively, use hot glue to attach the rose to the organizer base.
Part 3: Assembly
- Use a hot glue gun or sewing needle to attach the rose to a chosen position on the organizer’s base. Ensure secure stitching or adhesive so the rose stays in place.
Conclusion
This crochet cable organizer is a fun and versatile project that adds charm and functionality to your everyday life. With its simple yet unique design, beginners can comfortably practice their crochet skills while creating an accessory that’s both practical and decorative. Use it to organize headphones, charging cables, or create personalized gifts for loved ones.