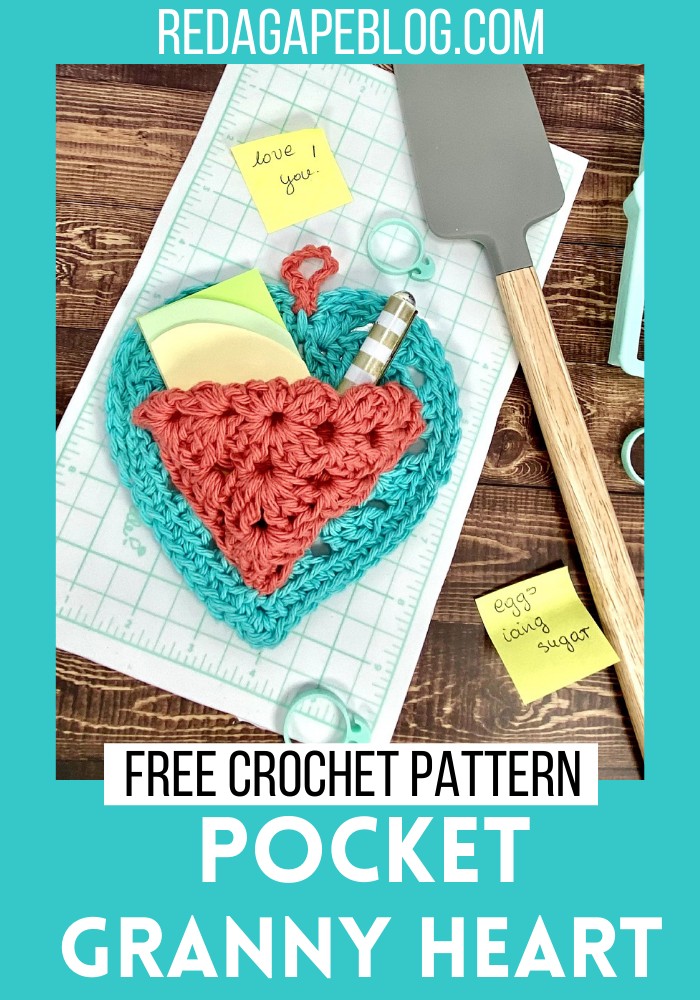
Pocket Granny Heart Pattern Free

The Pocket Granny Heart is a charming and simple crochet pattern, perfect for making quick gifts like Valentine’s Day presents, birthday surprises, or Mother’s Day crafts. This special project combines a handy little pocket for sticky notes with a delightful granny heart, making it not only a beautiful decorative piece but also a practical item for keeping pens and notes organized. Designed for crocheters at all levels, from beginners to the more advanced, the crochet heart pattern is broken down into easy steps. You’ll start by creating a granny square, then learn how to turn that into a heart shape, and finally, assemble it into a pocket heart ideal for sticky notes. Whether you’re making one for a friend or yourself, this project promises to be both enjoyable and useful.
Pocket Granny Heart
Making Your Pocket Granny Heart
Abbreviations:
- Ch= chain stitches
- Sl st = slip stitch
- Sc = single crochet
- Dc = double crochet
- Tr= treble crochet
- St(s) = stitch (es)
Materials:
- Yarn ( I am using lily sugar cream – it’s a worsted weight yarn)
- Crochet hook – h/8 5mm size
- Scissors
- Yarn or tapestry needle
- The pattern is written in us terms.
- To crochet a pocket granny heart, you will need 2 granny squares – the first granny will be for the pocket.
Step by step Pattern
- Make a slip knot.
- Ch 4.
- Insert the hook into the 4th chain from the hook (it will be the first chain just after the slip knot). Yarn over and pull loops on the hook through – (you just made a sl st closing the foundation ring.
- Tip: instead of using a foundation chain, you may start with a magic ring. But it is optional.
- Granny square: foundation
First row:
- Start with ch 5. (it will count as our first dc and ch 2).
- All the next dc stitches will be made into the foundation chain:
- 3 dc. Ch 2. Repeat 2 times.
- 2 dc. Insert the hook into the 3rd chain of ch-5 from the start of this round. Sl st.
- Sl st into the closest 2-ch space.
- Granny square: row 1
Second row:
- Start with ch 5. Make 3 dc into ch-2 (corner) space.
- Ch 1 and make 3 dc into the next 2-ch space. Ch 2 and 3 dc in the same 2-ch space.
- Repeat this step 2 times.
- Ch 1 and 2 dc into the last corner space. Sp st into the 3rd ch of ch 5 from the beginning of the round.
- 4. Finally, sl st into the ch-2 space.
- Granny square: row 2
Third row:
- Start with ch 5. Make 3 dc into ch-2 (corner) space.
- Ch 1 and make 3 dc into the next 2-ch space (in the middle of the square side). Ch 1 and 3 dc in the corner 2-ch space. Ch 2 and 3 dc into the same corner.
- Repeat this step 2 times.
- Ch 1 and 2 dc into the last corner space. Sp st into the 3rd ch of ch 5 from the beginning of the round.
- 4. Finally, sl st into the ch-2 space.
- Crocheted granny square
- Step 1: make a granny square for a pocket
- After 3 rows, we will repeat the steps to make the same square for the pocket.
- If you want to make the square bigger, add more rows using the same pattern – 3 dc, ch 2 , 3 dc into each of the corners, ch 1 and 3 dc into each of the 2-ch side spaces.
Finish off:
- Make 1 ch more, cut the yarn and pull the end out. Pull the yarn to tighten the knot. Weave in the ends using yarn or tapestry needle.
- If you want your square to look even neater, I recommend that you block it. You can use anything you have at home, such as a foam mat and some toothpicks.
Step 2: how to make a basic granny heart:
- Repeat the steps above from how to crochet a granny heart to make 2 rows of a granny square.
Fourth row:
- We have finished step 2 on the square’s corner.
- Make 8 tr crochet into next 2-ch space. Sp st into the 2-ch corner space. Make 8 tr crochet into next 2- ch space. Sp st into the next 2-h corner space.
- How to make a granny heart
- How to make a granny heart
Step 3: how to crochet a pocket granny heart:
- Fifth row:
- Sp st in to the next ch. Ch 3 and 2 dc into the same space. Ch 1.
- 3 dc into the next 2-ch space. Ch 1.
- 3 dc into the bottom of the heart. Ch 3. Another 3 dc into the same bottom ch-2 space. Ch1.
- 3 dc into 2-ch space, ch1. Repeat.
- Skip the edge of the square and 2 tr. Make 3 dc into a space in between the 2nd and 3rd treble.
- (ch1. Skip 3 next tr and make 3 dc) *. Repeat.
- Ch 1. Sp st into the sp st from the row below. Ch1. 3 dc in the next ch space.
- (ch1. Skip 3 tr and make 3 dc into space between tr) * repeat.
- To finish the round, sp st into the 3rd ch of ch 3 from the beginning.
- Granny heart: row 5th
- Granny heart: row 5th
Sixth row:
- To make a border sp st under the next ch and ch 1 and sc into each chain space around the heart. Finish with a sp st into the first sc.
- Weave in the yarn end.
- Granny heart with a border
- Granny heart with a border
Making a pocket:
- To make the pocket, fold the first square and hand sew it to the heart base.
- Advice: when folding a pocket, roll it just a bit off center and try to align the holes of the squares to make the nicest transition between the two.
- To sew on the pocket, you can use the same yarn as you made it out of. Tease out one or two strands to have a thinner yarn for sewing it on.
- Making a hanger:
- With the same color of yarn as the pocket, make a sp st. Insert the hook into the top of the square, make ch 10 and sp st it back. Weave in the ends of yarns.