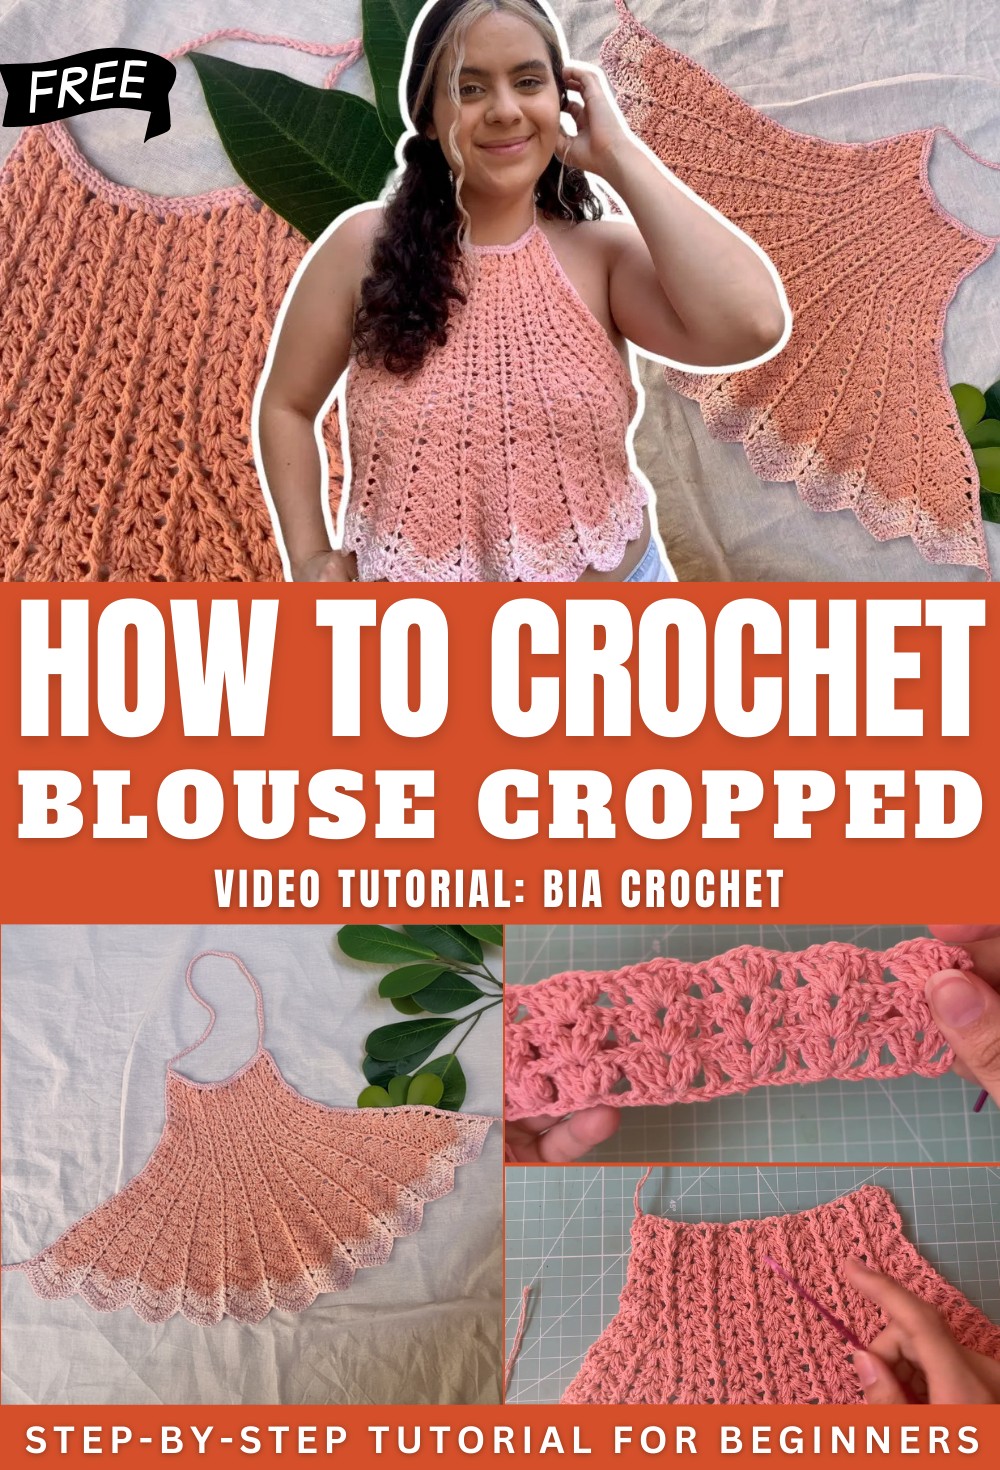
Unique Crochet Cropped Blouse Pattern with Eye Catching Outfit
Rock your summer style using this Free Crochet Cropped Blouse Pattern that brings a chic vibe and breezy feel for your next sunny adventure.
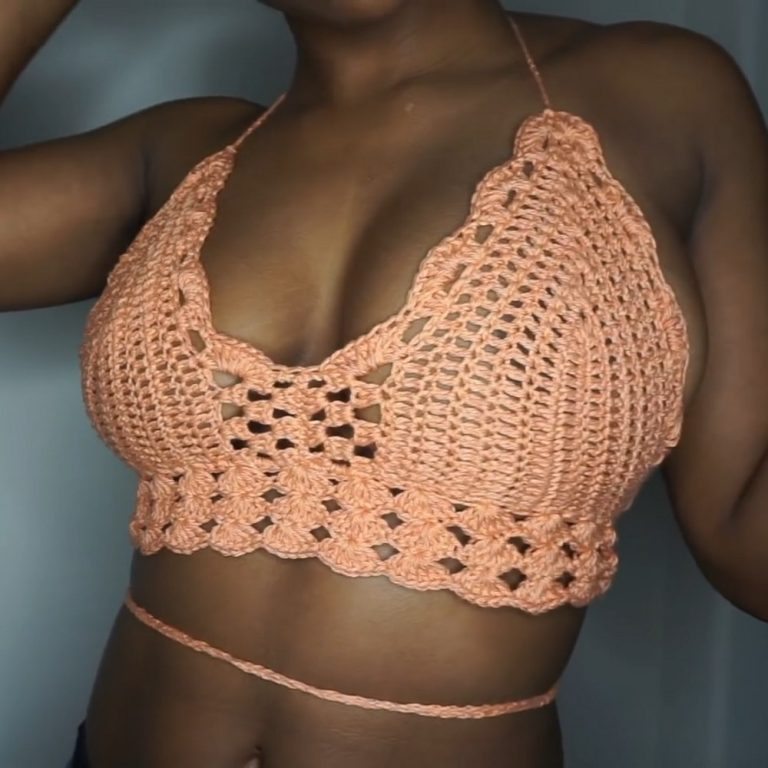
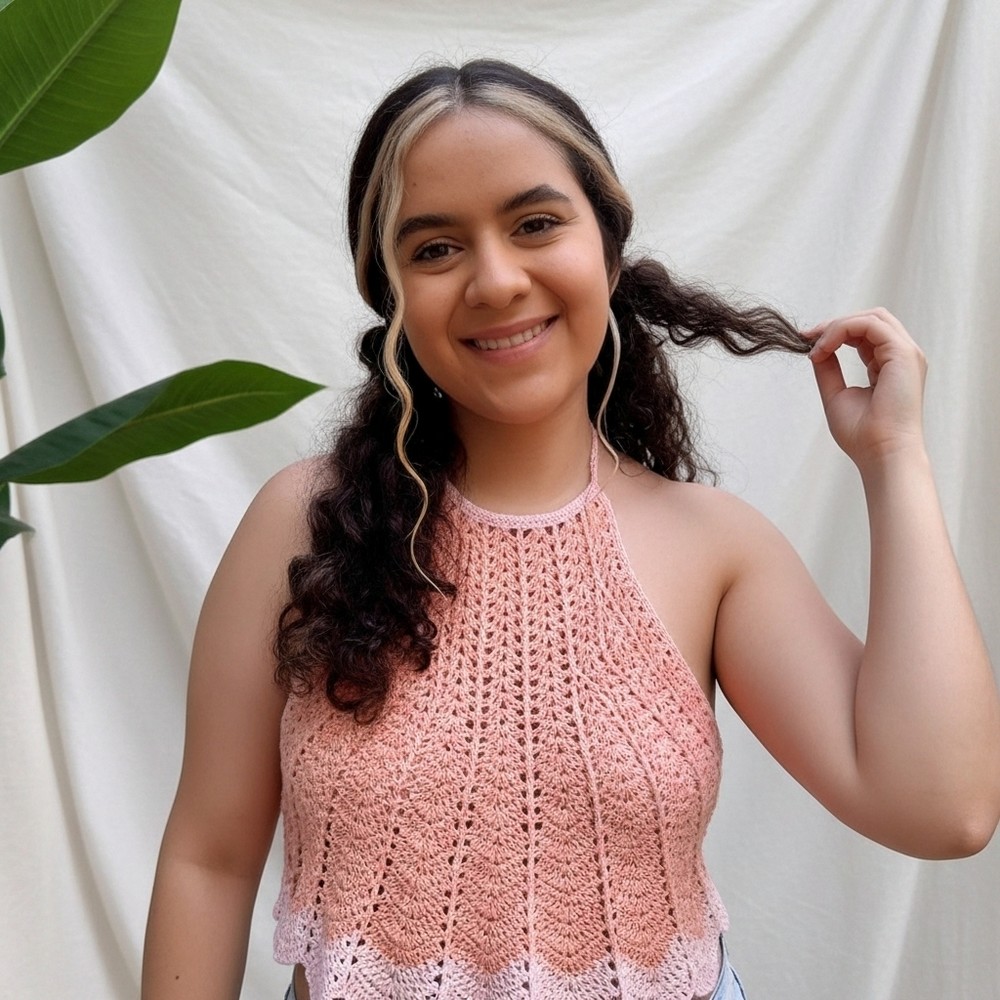
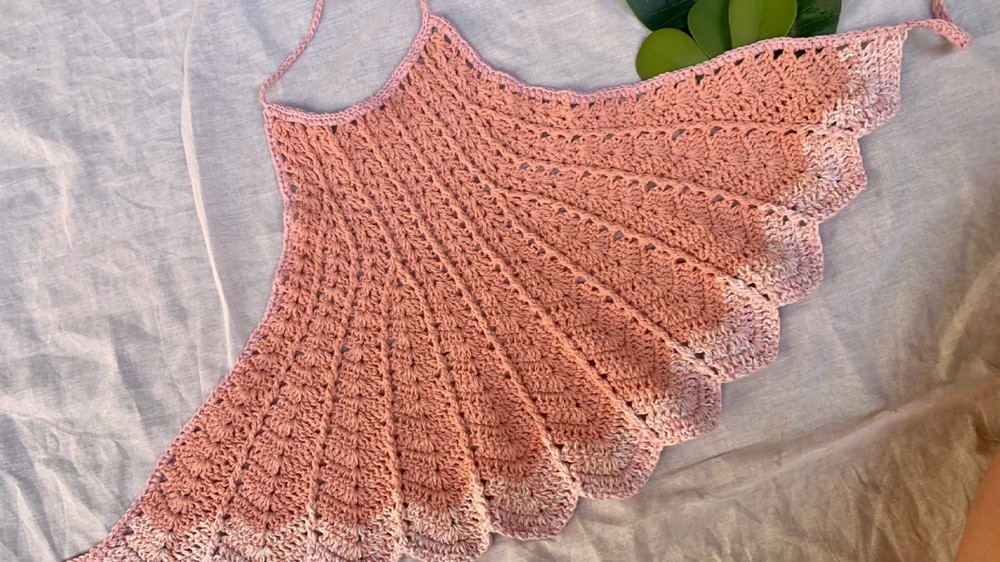
Vibrant Crochet Cropped Blouse Pattern for Chic Summer Style
Embrace the sun with a fresh take on handmade fashion that balances comfort and high-end style. This specific Crochet Cropped Blouse Pattern offers a sleek, geometric silhouette that perfectly adapts to the body, providing a tailored look without the need for complex tailoring. Its lightweight nature makes it an ideal companion for warm afternoons at the shore or stylish evening gatherings. The primary benefit of this design is its incredible versatility; the long, adaptable straps allow the wearer to transform the garment into three unique styles, essentially offering a full wardrobe update in a single project.
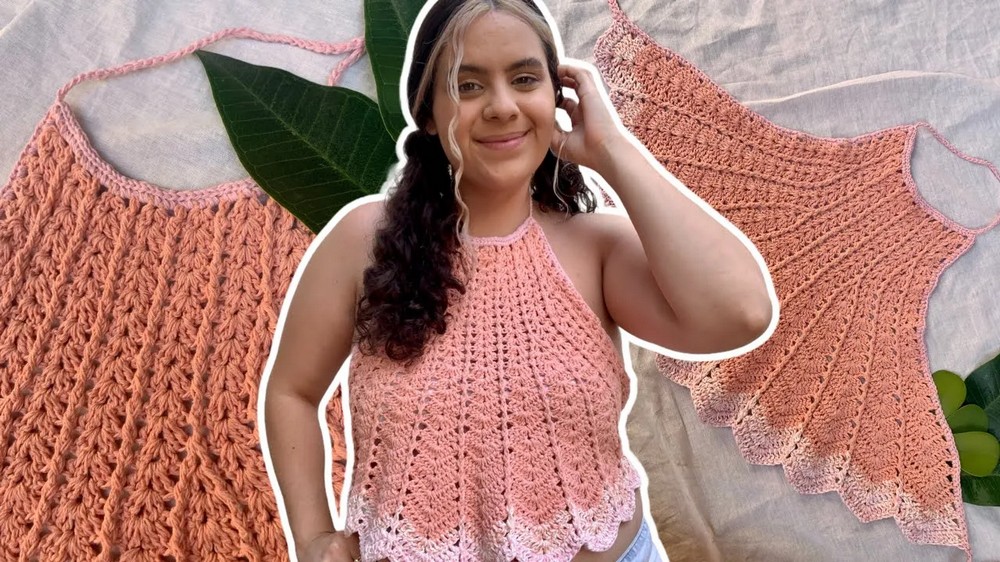
The breathable texture ensures you stay cool while the sturdy stitch work provides reliable support. With a modern duo-color aesthetic, the final result looks polished and intentional, radiating a trendy energy that complements any summer outfit. This garment serves as a functional art piece, proving that simplicity often leads to the most sophisticated and inviting results.
Materials
-
Yarn: Fiore yarn (Tex 295, similar to Ane yarn). The tutor uses double strands to achieve the desired thickness [00:23].
-
Crochet Hook: 2.5 mm [00:14].
-
Measuring Tape: To ensure the correct width and length for your size.
-
Scissors and Tapestry Needle: For finishing and weaving in ends.
Pattern Instructions
1. Foundation Chain and Setup
-
Calculate your starting chain based on the number of fan motifs (Size P = 5 fans, M = 6 fans, G = 7 fans). Each fan requires 6 chains, plus 1 for the edge [00:43]. For a size G, chain 43.
-
Row 1: Chain 3 (counts as double crochet). Skip to the 7th chain from the hook and work a fan (2 dc, ch 1, 2 dc) in the same stitch. Skip 2 chains, work 1 dc. Skip 2 chains, work another fan. Repeat across, ending with a dc [02:17].
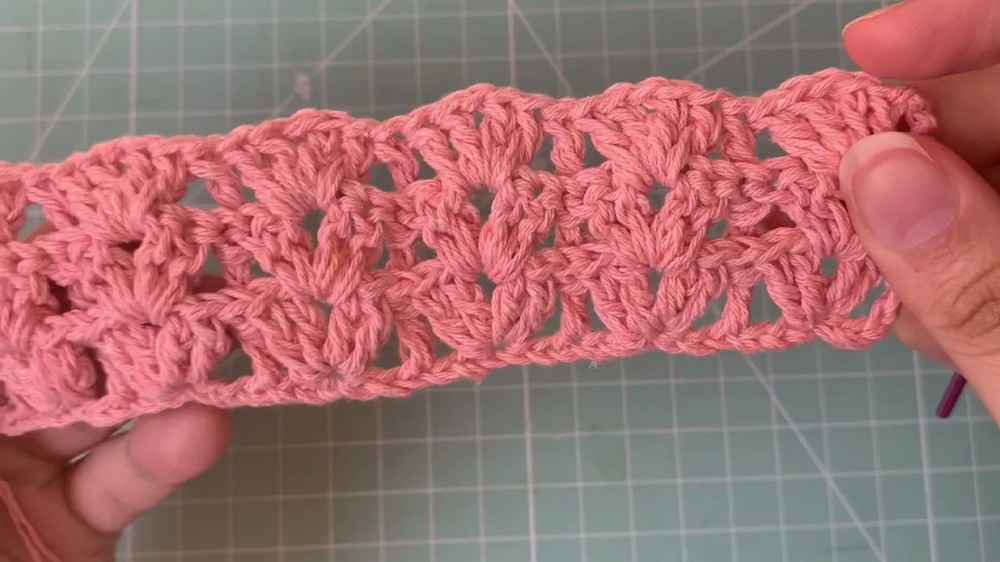
2. The Fan and Relief Pattern
-
Row 2: Chain 3 and turn. Work a fan inside the ch-1 space of the previous row’s fan. For the single double crochet, work a front post relief stitch (insert hook from front to back around the post). Repeat across [05:41].
-
Row 3: Chain 3 and turn. Work fans inside fans. For the relief stitch, work a back post relief stitch to keep the texture on the same side [08:15].
-
Repeat these rows for 5 total rows to establish the neck area [11:58].
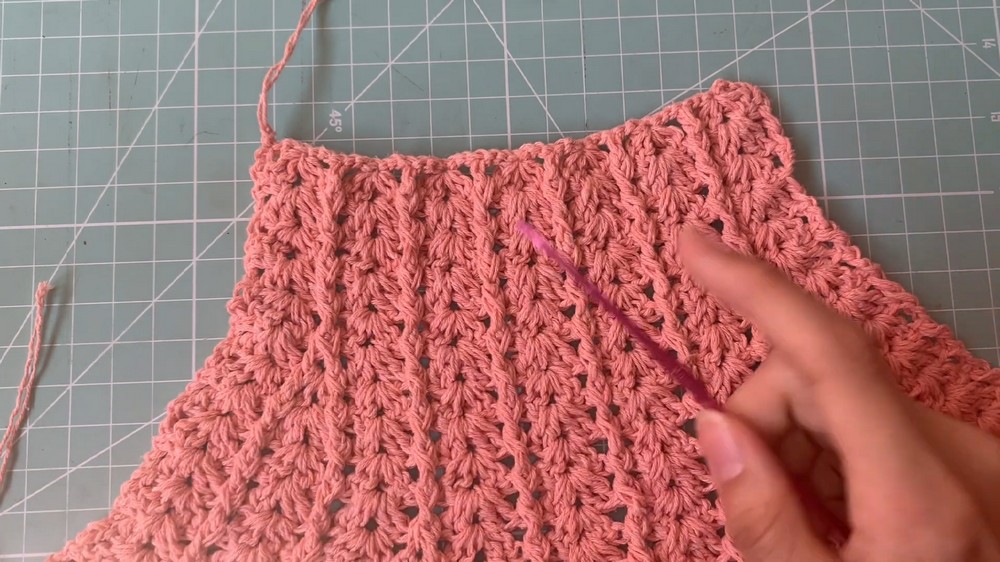
3. Expanding the Body (Increases)
-
Row 6: In the first and last relief stitches of the row, work (1 relief stitch, ch 1, 1 relief stitch) in the same place. This creates a “V” to start a new fan [12:43].
-
Subsequent Rows: In the next row, work a mini fan (1 dc, ch 1, 1 dc) inside that ch-1 space [15:27]. In the following row, expand it to a full fan (2 dc, ch 1, 2 dc) [18:44].
-
Continue this expansion logic (one row with increases, two rows without) until the top reaches your desired bust width (approx. 70 cm for size G) and length (approx. 35 cm) [36:14].
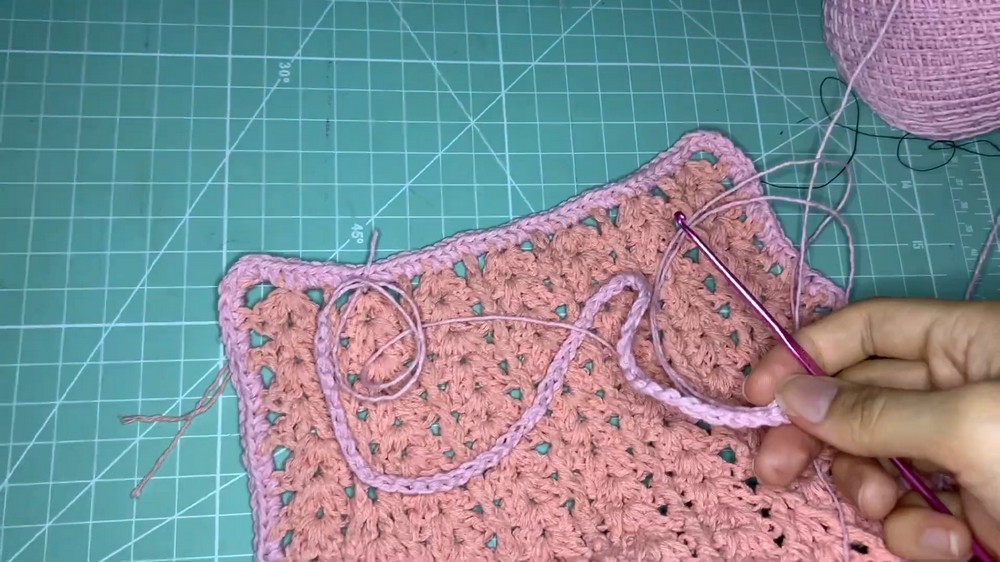
4. Straps and Finishing
-
Back Ties: Attach yarn to the bottom corners and chain a length long enough to tie at the back. Work single crochets back along the chain to make it sturdy [37:39].
-
Neck Ties: Attach yarn to the top corners, chain the desired length, and use slip stitches to work across the top edge to the other side before making the second tie [41:08].
Special Features
The fan-and-relief texture provides a sophisticated look that mimics high-end boutique crochet. The asymmetric expansion ensures the top fits comfortably over the bust while maintaining its shape.
Level of Difficulty
Intermediate. While the stitches are basic, the project requires alternating between front and back post relief stitches and managing specific increase rows to prevent the fabric from curling or waving [08:15].
Tutor’s Suggestions
-
Yarn Choice: Always use double strands if you are using a thinner yarn like Fiore or Ane to ensure the garment has enough structure [00:31].
-
Sizing Accuracy: Measure as you go. If the piece starts to “wave” too much (babbado), add an extra row without increases to flatten it out [29:50].
Uses
This cropped blouse is ideal for beach outings, festival wear, or layering over a camisole for a boho-chic everyday look.
Pro Tip
When working the relief stitches, pay close attention to which side of the work is facing you. Always work the post stitch so the “bump” stays on the front (right side) of the garment to maintain the vertical column look.