Free Crochet Cloud Keychain Pattern for Bags + Tutorial
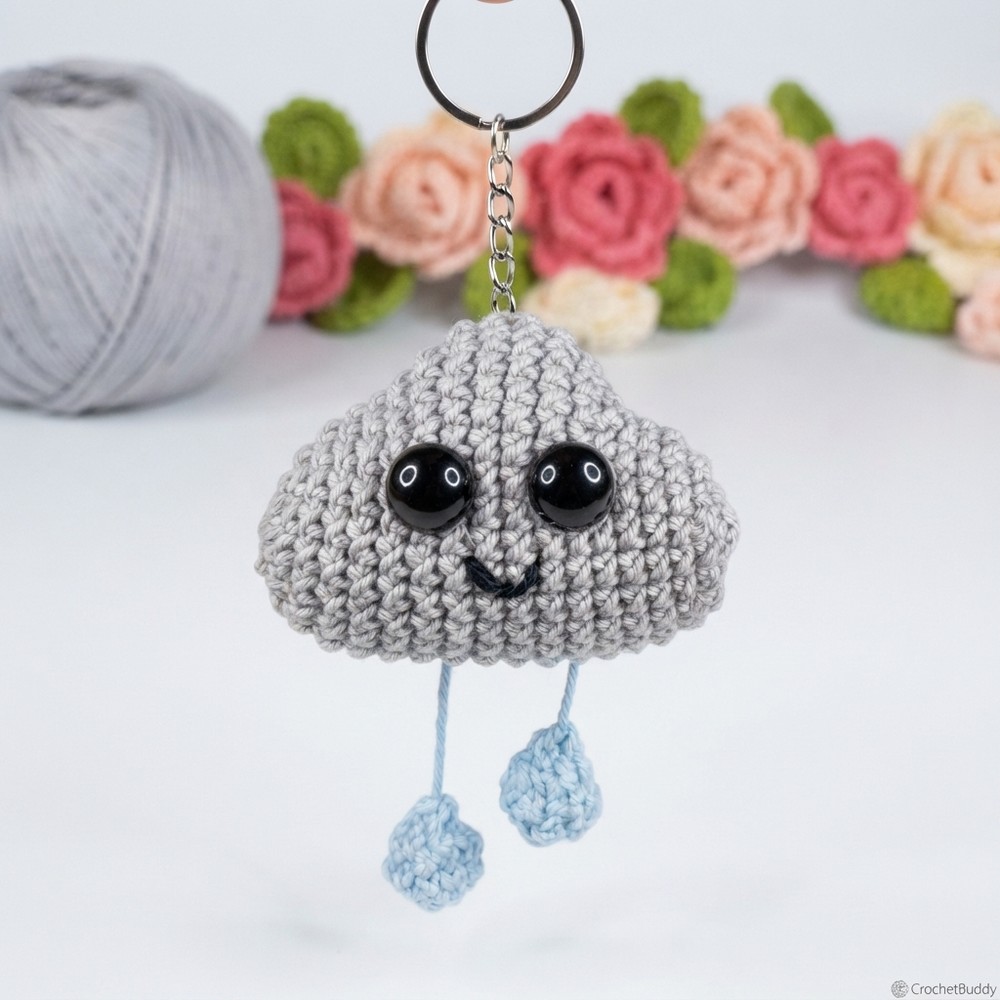
Make a soft and adorable Crochet Cloud Keychain with simple steps that add a charming touch to your keys or bags and create a wonderful gift idea.
Looking for a small and cute accessory to brighten your keys or bag? The Crochet Cloud Keychain is a fluffy white cloud that feels soft and looks charming. This delightful item comes from Crochet Mania, adding a special touch to the design.
Easy Crochet Cloud Keychain Free Pattern with a Cute Puffy Shape
The keychain’s puffy shape and smooth texture give it a friendly and cozy vibe. It fits nicely on backpacks, purses, or keyrings, giving everyday items a cheerful look. Its simple beauty and softness make it a lovely little gift that anyone can enjoy.

This cloud charm is both fun and useful. It is small enough to carry easily but stands out with its unique and playful appearance. Whether you like light colors or brighter hues, this keychain adds a sweet detail to your things.
For those who want a quick and simple crochet project, the Crochet Cloud Keychain offers a pleasant experience. The free pattern is easy to follow and works well for beginners or anyone looking for a satisfying result. Check out the free pattern and add a cheerful touch to your accessories with this cozy little cloud!
Cute Crochet Cloud & Raindrop Keychain Pattern
Today we’re going to work on a delightful project—a cute crochet cloud keychain with little raindrops. Perfect for gifts, quick sales, or adding a cheerful charm to your bag or keys, this project is very easy and fast to make, requiring minimal materials. Follow along step-by-step for a professional and adorable finish!

Pattern Basic Points
Features
- Amigurumi Style: Small stuffed cloud, worked in seamless rounds.
- Raindrop Charms: Two tiny drops attached at custom positions.
- Simple Embroidery: Embroidered mouth for added personality.
- Easy Assembly: All parts joined securely with yarn and glue.
Special Notes
- Keep your tension even for a neat, rounded cloud shape.
- Stuff lightly for a soft, plush effect.
- Raindrops can be attached at varied heights or positions for a playful look.
- Customize thread colors—classic white cloud or pastel blue, and raindrops in your favorite hues.
- You can sell these keychains or gift them; adjust your pricing to suit your materials and time.
Skill Level
Beginner to Advanced Beginner
You’ll need to know how to make basic crochet stitches (chain, single crochet, slip stitch), the magic ring, invisible decrease, and basic embroidery for the face. Some sewing and assembly required.
Materials
- Crochet Thread/Yarn:
- Light blue (cloud)
- Lead (grey, for main piece)
- Black (for mouth embroidery)
- Colors for raindrops of your choice
- Crochet Hook: Size appropriate for your yarn (commonly 2–3 mm for amigurumi)
- Fiberfill Stuffing: Optional, for puffy look
- Scissors
- Yarn Needle/Tapestry Needle: For sewing pieces, embroidery, weaving in ends
- Keyring: For attachment
- Hot Glue Gun: For securing safety eyes or embroidered features
- Safety Eyes or Black Beads: Optional, for the cloud’s face
Measurements / Sizing (Optional Schematic)
- Finished Cloud: Approx. 5–6 cm wide, 4–5 cm high
- Raindrops: About 1–1.5 cm each
- Keychain Length: 7–9 cm total, depending on placement
Gauge (and Stitch Pattern if applicable)
- Gauge is not critical but stitches should be tight so stuffing doesn’t show.
- Sample: 6 sc in magic ring creates a circle about 1 cm in diameter with fine yarn.
Stitch Abbreviations
- mr: magic ring
- ch: chain
- sc: single crochet (low point)
- sl st: slip stitch
- inc: increase (2 sc in same stitch)
- inv dec: invisible decrease (sc 2 together using only front loops)
Special Stitches
- Magic Ring (mr): Adjustable loop for starting rounds cleanly.
- Invisible Decrease (inv dec): Insert hook in front loop of two stitches, pull yarn through both, complete sc.
- Increase (inc): Work 2 sc in same stitch.
Crochet Guide
Raindrop Motif (Make 2)
Round 1:
- Begin with magic ring.
- Secure with ch 1.
- Work 6 sc into the ring.
- Close with sl st in first sc.
Round 2:
- Ch 1.
- [sc in next stitch, inc in next stitch] — repeat for a total of 3 times.
- (Ends with 9 sc).
- Close with sl st in first sc.
- Secure the yarn tail so the ring doesn’t open.
Round 3:
- Ch 1.
- [sc in next stitch, inv dec in next stitch] — repeat for 3 times.
- (Ends with 6 sc).
- Close with sl st in first sc.
- Cut yarn, leaving a tail.
Assembly:
- Hide excess of magic ring and stuff lightly if desired.
- Use yarn needle to close the opening neatly, weaving in tail.
- Repeat for second raindrop.
Cloud Body
Round 1:
- Begin with magic ring in lead-colored thread.
- Secure with ch 1.
- Work 6 sc into the ring.
- Close with sl st in first sc.
Round 2:
- Ch 1.
- Work inc in each stitch (2 sc per stitch).
- (Ends with 12 sc).
- Close with sl st in first sc.
Round 3:
- Ch 1.
- [sc in next stitch, inc in next stitch] — repeat for 6 times.
- (Ends with 18 sc).
- Close with sl st in first sc.
Rounds 4–6:
- Ch 1.
- Work sc in each stitch around (18 sc per round).
- Close each round with sl st in first sc.

Round 7:
- Ch 1.
- Work 6 sc.
- Next, [inc in next stitch] — repeat 6 times (adds 12 sc).
- Work 6 sc.
- (Ends with 24 sc).
- Close with sl st in first sc.
Round 8:
- Ch 1.
- Work 6 sc.
- Next, [sc, inc] — repeat 6 times.
- Work 6 sc.
- (Ends with 30 sc).
- Close with sl st in first sc.
Rounds 9–12:
- Ch 1.
- Work sc in each stitch around (30 sc per round).
- Close each round with sl st in first sc.
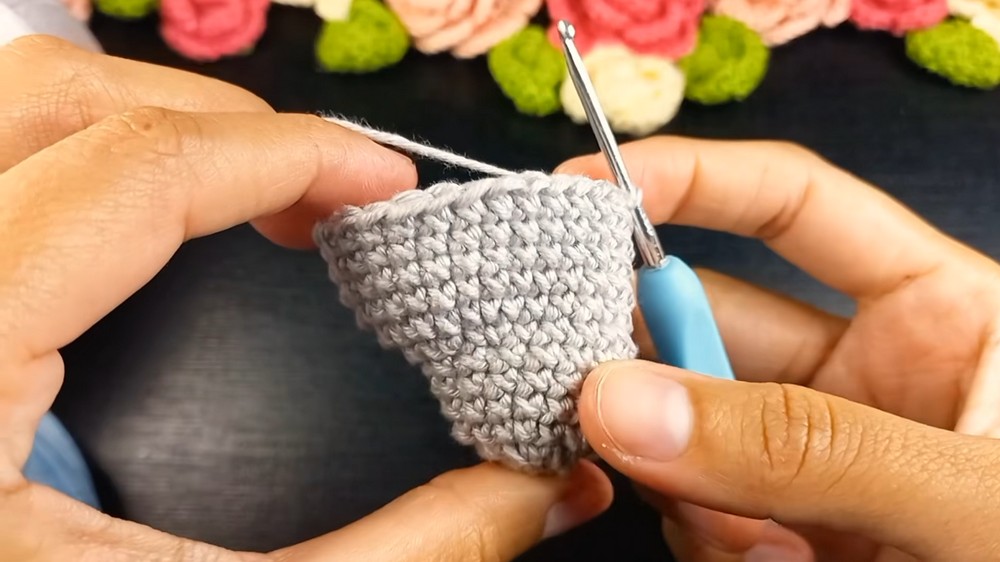
Round 13:
- Ch 1.
- Work 6 sc.
- Next, [sc, inv dec] — repeat 6 times.
- Work 6 sc.
- (Ends with 24 sc).
- Close with sl st in first sc.
Round 14:
- Ch 1.
- Work 6 sc.
- Next, [inv dec] — repeat 6 times.
- Work 6 sc.
- (Ends with 18 sc).
- Close with sl st in first sc.
Rounds 15–17:
- Ch 1.
- Work sc in each stitch around (18 sc per round).
- Close each round with sl st in first sc.
Round 18:
- Ch 1.
- [sc in next stitch, inv dec in next stitch] — repeat for 6 times.
- (Ends with 12 sc).
- Close with sl st in first sc.
- Stuff the cloud firmly but softly before the next round.
Round 19:
- Ch 1.
- [inv dec] — repeat 6 times.
- (Ends with 6 sc).
- Close with sl st in first sc.
- Cut yarn, leaving a long tail for sewing.
Assembly & Finished Size
- Using yarn needle, close the remaining hole with the tail, weaving in for a neat finish.
- Attach the keyring securely at the top of the cloud.
- Use remaining tails or fresh yarn to sew two raindrops to the bottom center of the cloud.
- Attach one between rounds 8 and 9, and the other between rounds 12 and 13.
- Vary placement for a playful waterfall effect; secure thread end at the back.
- Optional: Attach safety eyes or glue small beads to the front at the desired height.
- Use black thread to embroider a simple mouth.
- Cloud color can be customized; classic white or pale blue work well.

Conclusion and Ending Words
This adorable amigurumi-style project is quick, fun, and customizable, making it perfect for gifts, online sales, or just to enjoy for yourself. The basic shape, fluffy stuffing, playful drops, and embroidered face create a pleasing and whimsical accessory. Adjust colors, drop positions, and facial expressions as you wish for endless variation.