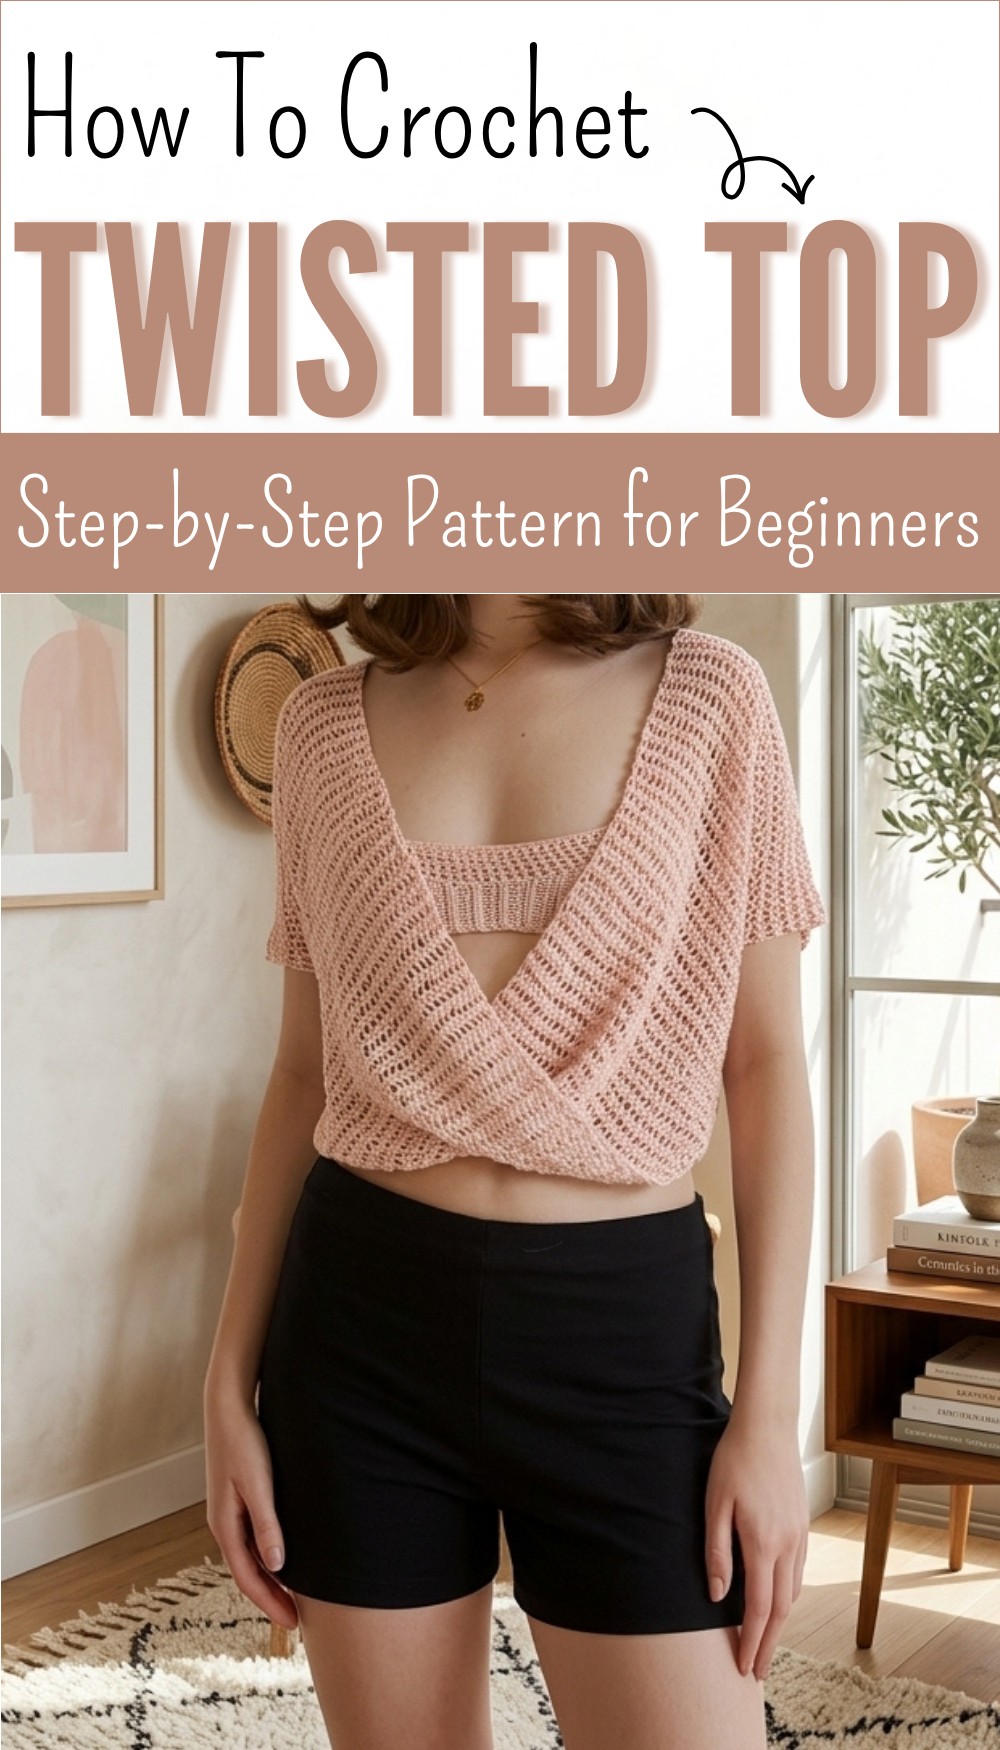
Free Crochet Twisted Top Pattern for Summer

Upgrade your style using free crochet twisted top pattern that adds texture to everyday outfits, perfect for casual outings or layered looks.
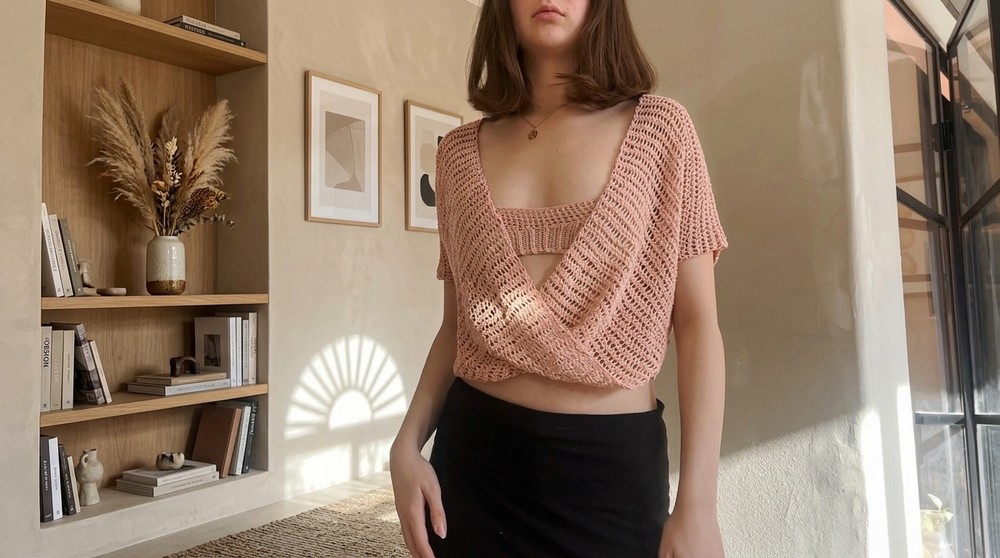
A stylish and eye-catching design can bring new life to your wardrobe, making you feel proud and joyful every time you put it on. With a clever front twist, this top stands out, offering a unique appearance that catches everyone’s attention. Easy to wear and comfortable for daily use or gatherings with friends, this piece is both practical and fashionable. The crochet twisted top pattern also lets you play with your favorite colors and yarns for endless creative possibilities.
Fresh Crochet Twisted Top Pattern Available Free

Its clever structure adds a fashionable touch, yet remains simple enough for anyone to try. Lightweight and airy, it’s perfect for sunny days, layering with a jacket, or dressing up with accessories. Enjoy the satisfaction of making a beautiful garment that brings compliments and becomes an essential part of your everyday style. This pattern offers both beauty and usefulness for all ages, for any occasion, and for any season.
Free Crochet Twisted Top Pattern
Materials
- Yarn: Worsted weight yarn (#4), approximately 250g (adjust for size)
- Hook: 5.0 mm (H-8) crochet hook (or size needed for desired drape/looseness)
- Yarn needle: For weaving in ends
- Scissors
- Stitch markers or safety pins: To mark armholes and side seams
- Measuring tape: For a custom fit
Key Abbreviations
- ch = chain
- sl st = slip stitch
- hdc = half double crochet
- st(s) = stitch(es)
- rep = repeat
- RS/WS = right side/wrong side (optional, for clarity)
Special Notes
- The pattern is made-to-measure for your fit. Begin with a custom chain based on your measurements.
- The initial foundation chain (or Foundation HDC) sets both the length of the sleeves and the width across the body (armpit to armpit, front).
- The garment is constructed from two identical panels, joined with a twist at the shoulder.
- If you prefer a flowier look, use a hook one size larger than yarn recommends and crochet with loose tension.
- Slip stitching is the chosen joining method for a neat seam.
- Try on your project as you go for optimal fit.
Instructions
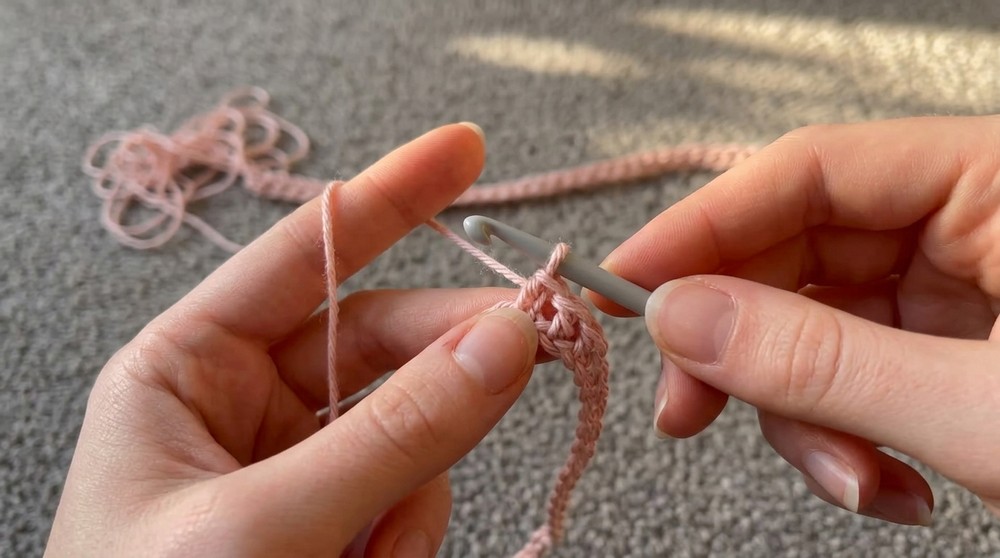
1. Foundation Chain
- Option A: Standard Chain
- Ch the number needed to reach from one wrist, across your back (or front) at bust/waist, to the opposite wrist. This should also fit from one side of your waist to the other.
- Keep the number moderate: the video sample uses 40 stitches. For different sizes, adjust as needed!
- Option B: Foundation Half-Double Crochet (FHDC)
- Work a foundation row of hdc stitches to your measurement (as above).

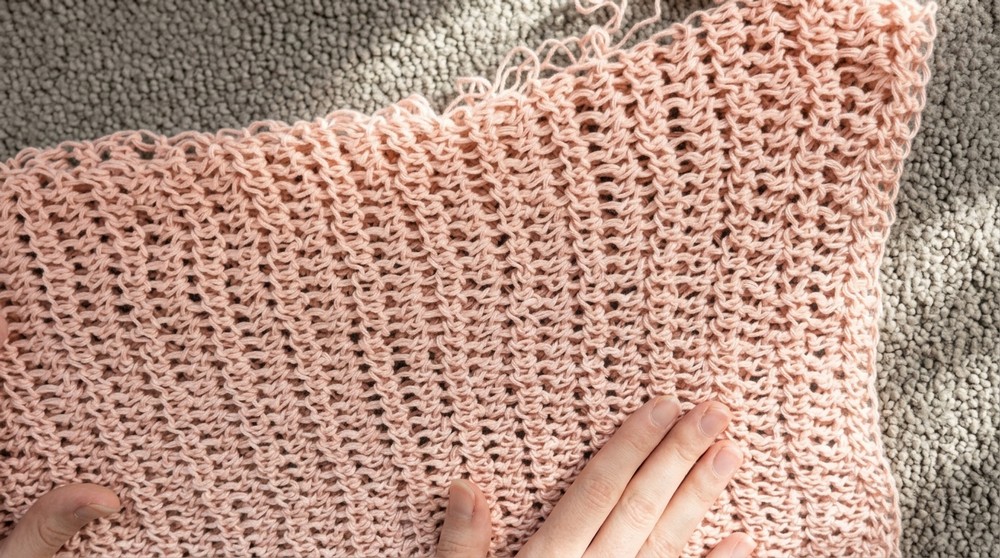
2. Panel 1
Row 1:
- Work hdc in each ch across (or into each FHDC).
- Result: This is the length of your sleeve and the width across the body.
Row 2 and onward:
- Ch 1, turn. Hdc in each st across.
- Repeat this row until the panel is long enough that, when folded in half (lengthwise), it reaches from your shoulder to the desired cropped/waist length.
- Tip: Fold your growing panel in half frequently and hold it to your body to check the length.
Row Counting:
- Example in video: 74 rows total (when folded in half, this created the ideal body length).
- Tip: When panel (doubled) reaches the desired length, stop.
Finish off and weave in the end.
3. Repeat for Second Panel
- Make a second identical panel with the same stitch count and number of rows.
4. Assembly
Joining Shoulders
Step 1:
- Lay both panels on top of each other, aligning the ends.
Step 2:
- Slip stitch across one set of ends (40 sts across the short edge) to join the first shoulder seam.
Step 3: (Twist)
- Take the top panel, twist it once at the shoulder.
- Bring the twisted panel’s edge to meet the remaining edge of the un-twisted (bottom) panel.
Step 4:
- Slip stitch across this second set of ends (40 sts) to join the second shoulder seam.
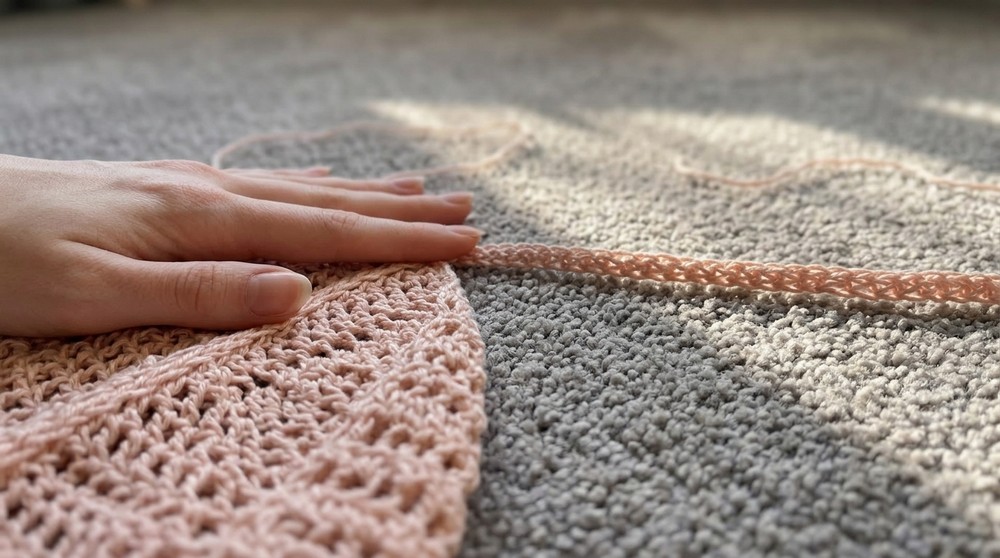
Closing the Sides (Underarms & Body)
Step 1:
- With the wrong side (the one with slip stitch seams) facing out, try on the top to determine where you want the sleeve opening to end and the body side seam to begin.
- Mark these points with stitch markers or safety pins on both sides.
Step 2:
- Remove the top and count rows between markers for accuracy.

Step 3:
- Starting at the underarm marker, attach yarn and sl st the side seams together, working into the side of each row:
- Work one sl st in the gap between rows, one sl st into the row end, for a snug closure.
- Repeat the process on the other side, making sure to match up the numbers of slip stitches and rows on both sides for symmetry.
5. Adding Ties at Shoulders
Step 1:
- At the neck-edge (inner side) of each shoulder seam, attach yarn.
Step 2:
- Ch 60 (or enough to make a bow you like).
- Sl st in each ch back to the base; sl st into the same seam or beginning to secure.
- Fasten off.
- Repeat for the second shoulder.
6. Finishing
- Turn the top right-side out.
- Weave in any loose ends with your yarn needle.
- Try on your new twisted tie top!
Conclusion
This project produces a chic twisted shoulder top with dramatic side-to-side construction and charming ties. It’s perfect for layering or warm weather wear, and the construction method means it’s easy to adapt for your personal size and style.
Pattern Correction & Tips
Correction:
- When starting, ensure your chain/foundation row is not too tight, as it forms both the sleeves and the “body width.”
- Be sure to twist only one panel for a proper front twist.
- Always double-check slip stitch joinings are on the same side of the garment for a seamless finish.
Tips:
- Try on often for optimal fit, especially before seaming sides.
- For color contrast, use a different shade or yarn for the ties.
- If you want a snugger fit at the waist, decrease a few chains at the starting edge and/or adjust rows after trying on.