Crochet Flower Granny Square Pattern For Loveliest Items
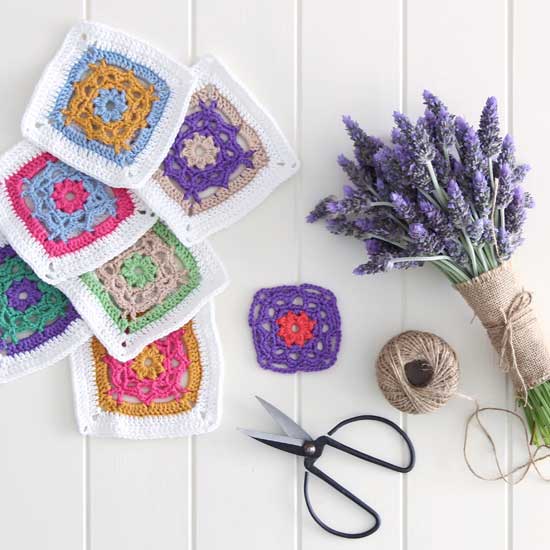
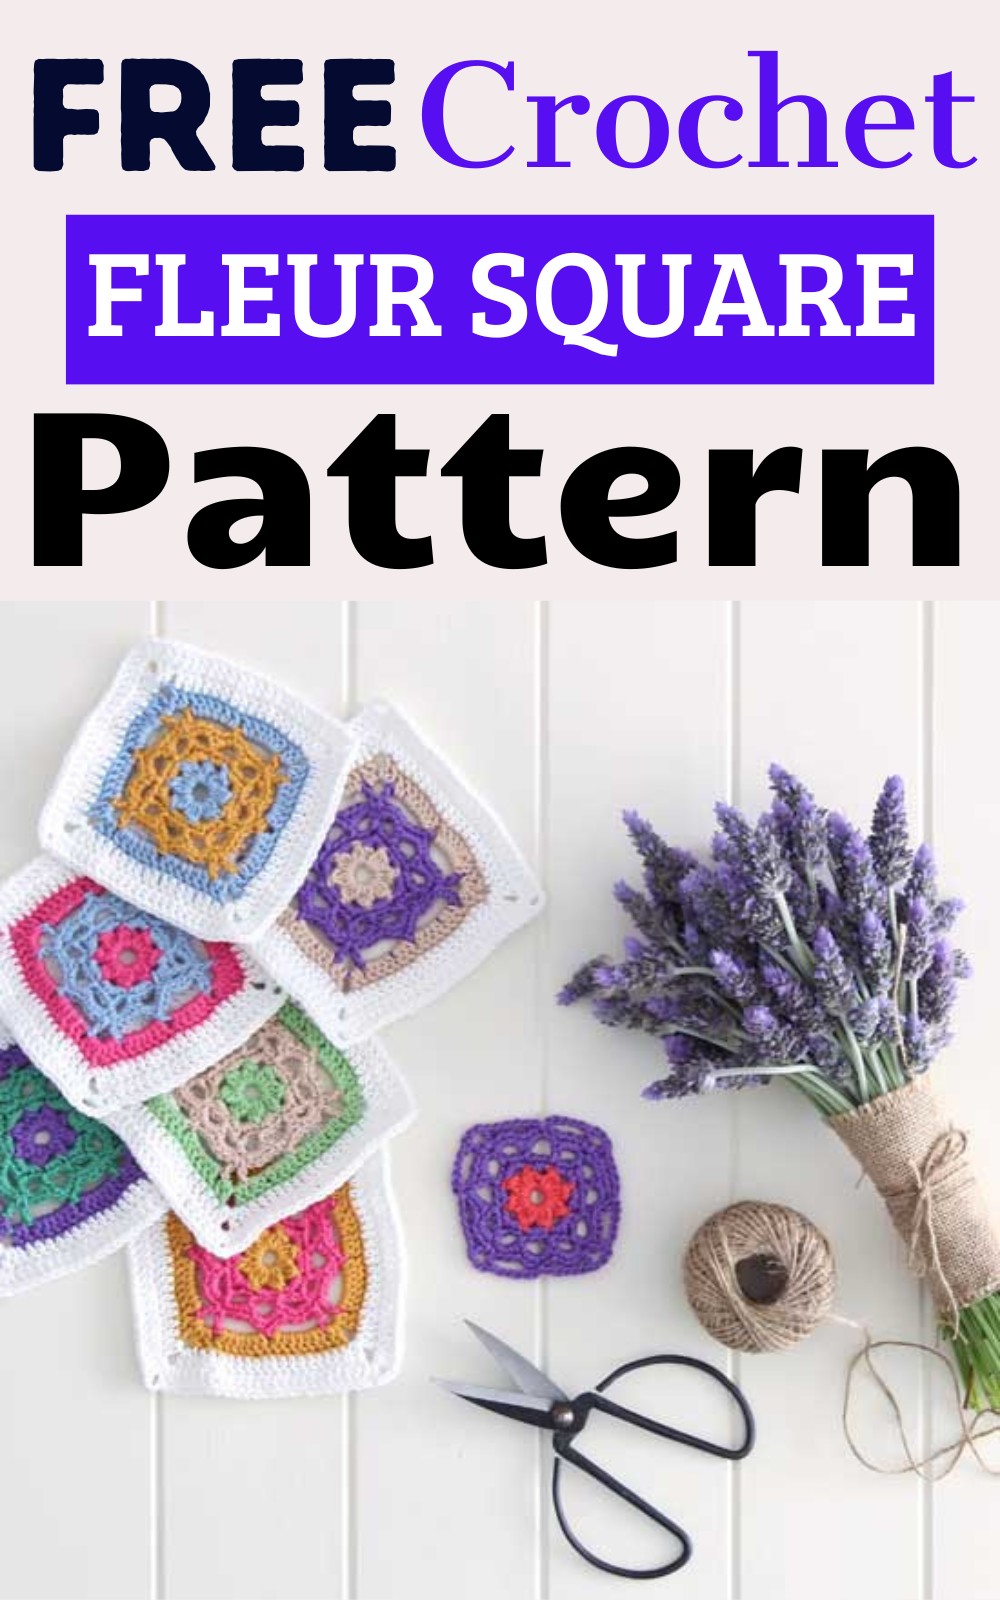
Do you want to learn how to crochet granny square but little advance version than classic? Try this crochet flower granny square pattern to make one (or many!) displaying a small & cute floral petals pattern in centre and the rounded squares in lacy and then dense textures around with beautiful color transition. At first, this floral granny square may seem complicated but actually super easy all using basic crochet stitches. You can use in blankets, bags, granny square pockets or anything else you want.
Crochet Fleur Square Pattern For All Crocheters
Crochet fleural or flower or floral granny squares (or whatever you say!) are the most loved form of these motifs. So, I also decided to share a unqie crochet flower granny square pattern that nobody will want to miss and look adorable as any item. So, keep reading this granny tutorial and learn to make a memorable, quick item today.
Fast Tips For Crochet Flower Granny Square Pattern
- A finished crocheted granny square may sometimes not lay completely flat to table which may make it difficult to seam. So always make sure you block each granny square before joining for a tidy finish.
- To avoid the irregular laying, you may should also make sure you maintain an even tension and in some regions, dont tense too much.
- A seamless joining is neceassy for the garnny square if want a professional finish. So, choose a Join As You Go (JAYG) granny square joining technique that I explained in a tutorial is best for this purpose in which you join the uncomlted square with a completed one.
- To avoid the phrase “granny square not looking like sqauare” you should count the sticthes as you go.
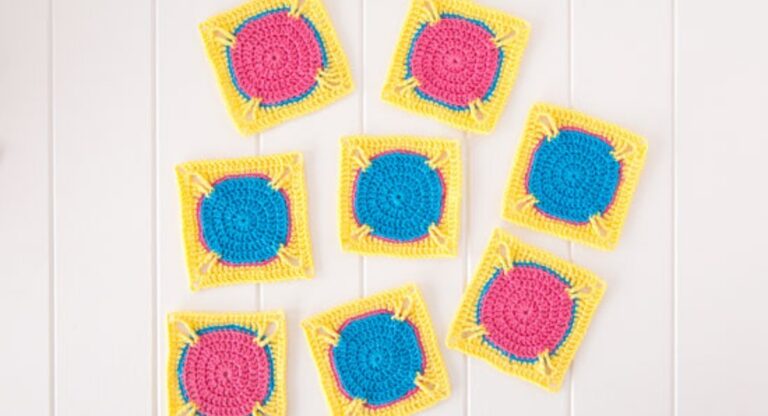
- When practicing for the first time, you should use the light colors.
How to Crochet Flower Granny Square
Skill Level: Intermediate
Pattern Note: The instructions are in UK terms, and there are both UK and US shorthand instructions at the end of the tutorial.
Materials You Will Need:
Before heading to start, understand what materials will be
Yarn: I needed many different properties in the yarn like it should maintain the shape well, should be in many colors, as soft, that does not pill, easy for beginners to work (to present novices!) and as for my crochted pillow, should not be stretchy. Finding all these in one yarn was difficult.
So, I chosen the cotton-acrylic blend as 8ply (DK!) Patons Cotton Blend yarn. I found a property that other was lacking. For example, cotton does not maintain shape, but acrylic does. Similarly, if acylic pills of cotton not. So, I think blend will be a good option. However, the final decision for your chosen yarn may spend the pupose of granny. But make sure, you choose the DK weight as I did to achieve the gauge.
Hook: I used the same 4mm hook as used for other DK yarns. Make sure you are are hoo you are comfortable when trying to do something bigger.
Scissors: While changing the colors, scissors are best instead of using the teeth!
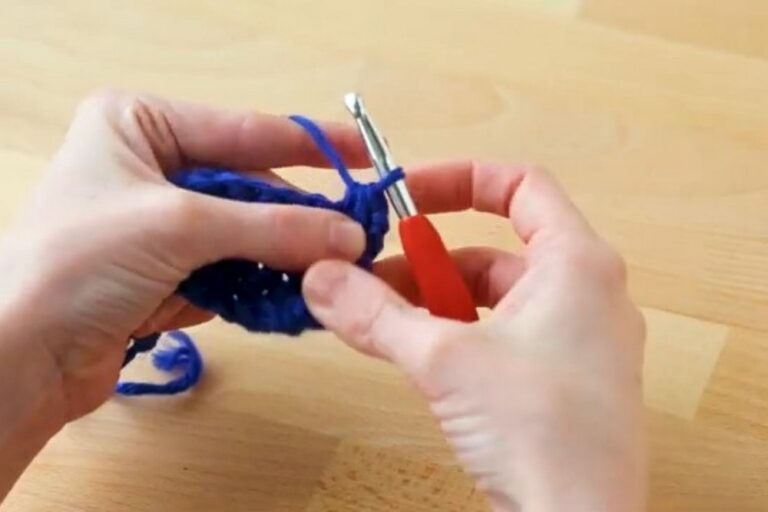
Crochet Techniques You Need To Know
Here are some basic techniques that you will need to know before following my crochet flower granny square pattern:
chain(ch): Very Crucial in the granny squares. To chain, wrap yarn around the hook (Yarn Over = YO) and pull through the loop.
slip stitch(sl st): Crucial for working in the round and joining the ends. To do, insert hook into the stitch, YO and pull up a loop and then pull through both the loops.
chain-x space(ch-x sp): To chain space of “x” number, you make some chains first or not (more chains more larger space!), skip “x” loops (more loops larger space!) and then work into the next stitch. You willl use here for the lacy design in my crochet fleur pattern.
double crochet(=single crochet!): For dense stitch mainly. To do, insert hook to stitch, YO, and pull up a loop. “YO and pull through two” X 2.
treble crochet(=double crochet!): YO, insert hook to stitch, YO, and pull up a loop. “YO and pull through two” X 3. It is also very famous for the grannies.
Additional Techniques That Are So Easy:
You will notice some uncommon abbreviations while following the pattern, here is a crack code:
treble two together(tr2to)= double two together: It means you have to work two double crochet in a same stitch at the same time in two sticthes. It will fast up the work and create some gaps. For this, you will start by YO, inserting hook to sticth and pulling up a loop. Again YO and pull through two loops. *When have two*, YO again and instead of pulling through remaining, insert hook to next sticth, and pull up a loop. You will have four loops. YO again and pull through two, again YO and pull through remaining three once.
threble 3 together(tr3to)= double three together: It means this time work 3 double crochet at a time. After * *, instead of pulling through. YO and insert the hook to the stitch and pull up a loop. YO and puul through the two out of 5. YO and pull through the remaining four at one.
Instructions:
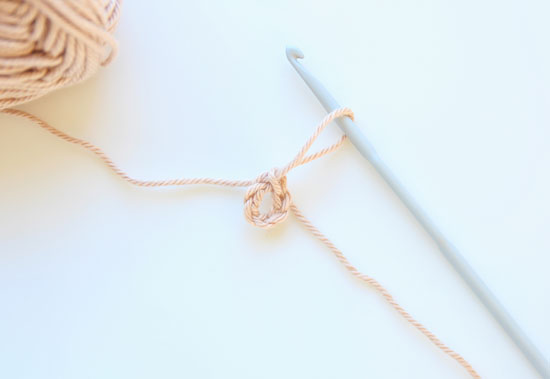
Step 1 – With color A, Ch6, Sl st to first ch to form a loop.
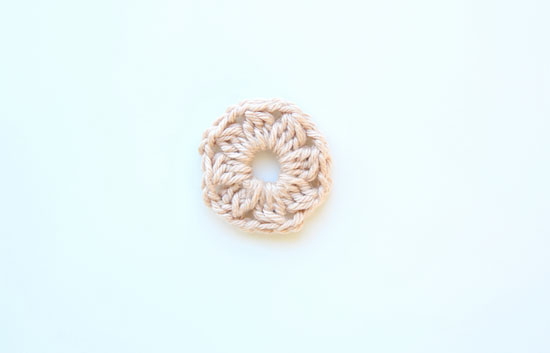
Step 2 – Ch3, tr2tog (counts as 1tr3tog) ch2. *tr3tog, ch2* repeat from * to * 7 times (8 x tr3tog, 8 x ch-2 spaces). Fasten off.
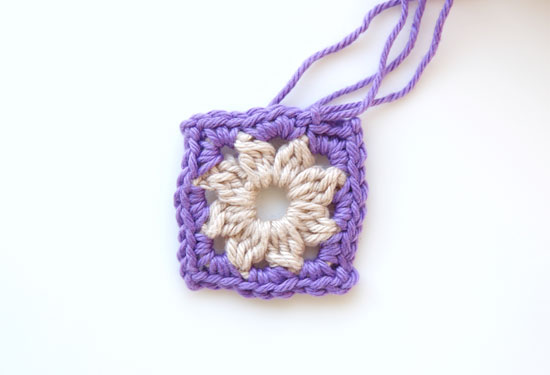
Step 3 – With colour B, Sl at into any ch-2 space and work 3dc. Skip to the next ch -2 space and work 2dc,2ch,2dc (to form a corner) *In the next ch-2 space work 3dc and then 2dc, ch2, 2dc in the following ch-2 space * Repeat from * to * 2 more times. Sl st into first dc (4 x 3dc groups, 4 x 2dc,ch2,2dc groups).
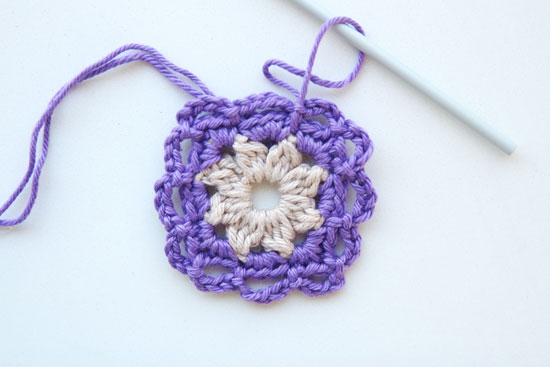
Step 4 – *Ch5, sl st in the stitch just after the 3dc group from the previous round. Ch4 then sl st in the ch-2 space at the corner, ch4, sl st just before the next 3dc group from the previous round.* repeat from * to * 3 more times (8 x ch-4 spaces, 4 x ch-5 spaces).
Step 5 -Sl st into the first ch-5 space, * work 5dc into the ch-5 space. 4dc into both of the ch-4 spaces at the corners. * repeat from * to * 3 more times (8 x 4dc groups, 4 x 5dc groups)
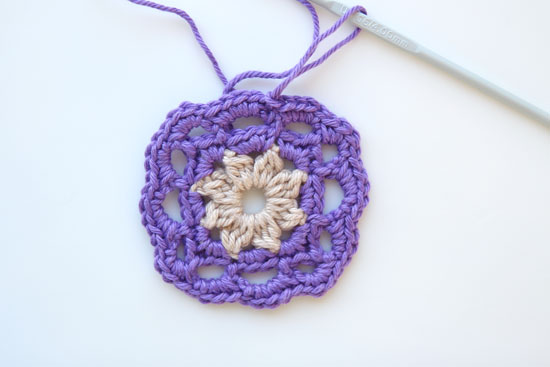
Step 6 – *Sl st into the 3rd dc (or middle dc) of the 5dc group from previous round. Ch5 then tr, ch3, tr at corner. Ch5 * then repeat from * to * 3 times and then Sl st to 3dc of 5dc group and fasten off. (8 x ch-5 spaces, 4 x tr, ch2, tr groups)
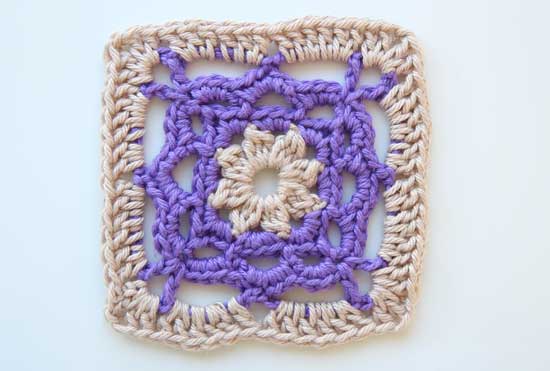
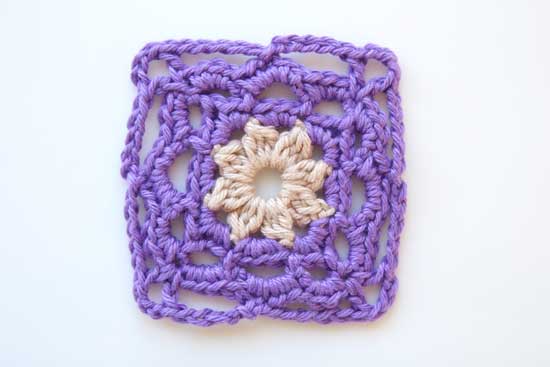
Step 7 – Switch to colour A. Sl st into any ch-3 corner space then * in the corner work 2tr, ch1, 2tr. Then 6tr in the next two ch-5 spaces* repeat from * to * 3 times and fasten off. (4 x 2tr, ch1, 2tr groups, 8 x 6tr groups)
Step 8– Switch to color C. Sl st into any corner space and * work 2tr, ch1, 2tr into the corner. 1tr in the next 16 stitches.* Repeat from * to * 3 more times. Fasten off. (4 x 2tr, ch1, 2tr groups, 16 trs along each side)
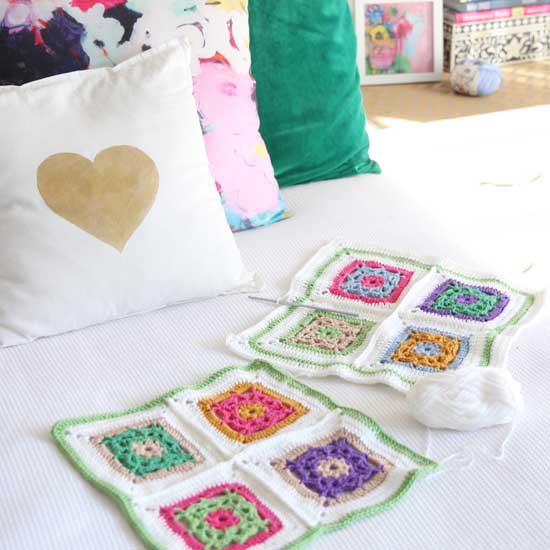
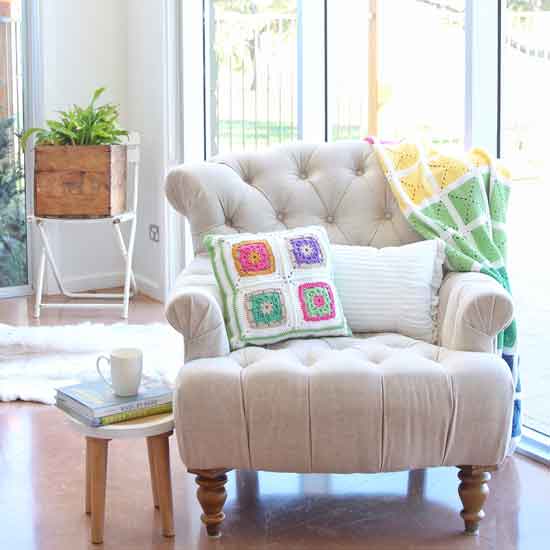
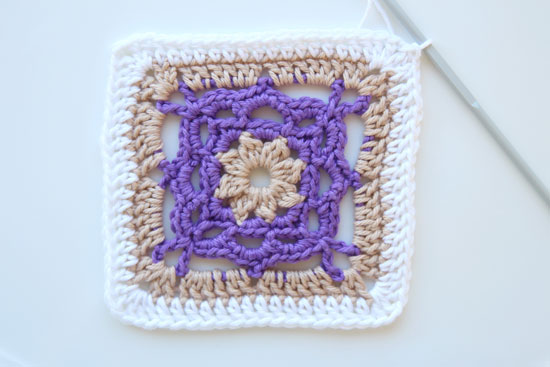
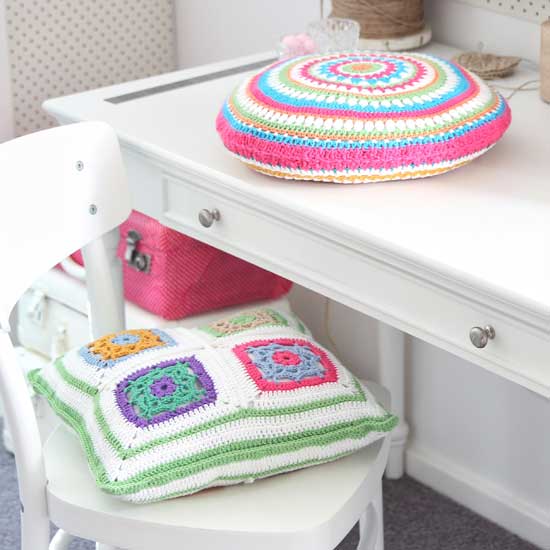
I added another round of white trebles to each of my squares and then i joined them together to form the centre of a cushion. A round of green and another couple of rounds of trebles in white finished off my cushion nicely.
I hope you enjoyed this tutorial. Here are the shorthand instructions for all of you clever crocheters.
Fleur Square (UK)
- 1 – Ch 6, sl st to first ch to form a loop
- 2 – 8 x tr3tog with ch2 in between. Fasten off (8 x tr3tog, 8 x ch-2 spaces)
- 3 – New color: 3dc along the sides. 2dc, ch2, 2dc at corners. (4 x 3dc groups, 4 x 2dc,ch2,2dc groups)
- 4 – Ch5 and then sl st over each 3dc group. Ch4, sl st into ch-2 space, ch 4 at corners (8 x ch-4 spaces, 4 x ch-5 spaces)
- 5 – 5dc in ch-5 spaces and 4dc in ch-4 spaces (8 x 4dc groups, 4 x 5dc groups)
- 6 -Sl st into 3rd dc in 5dc group, ch5 then tr,ch3,tr at corners, ch 5. Repeat 3 more times. Fasten off (8 x ch-5 spaces, 4 x tr, ch3, tr groups)
- 7 – New Colour: 2tr, ch1, 2tr at corners and 6tr into each ch-5 space. Fasten off. (4 x 2tr, ch1, 2tr groups, 8 x 6tr groups)
- 8 – New Colour – 2tr, 1ch, 2tr into each corner and 1tr into each of the 16 stitches along the sides. Fasten off.(4 x 2tr, ch1, 2tr groups, 16 trs along each side) Fasten off.
Fleur Square (US)
- 1 – Ch 6, sl st to first ch to from a loop
- 2 – 8 x dc3tog with ch2 in between. Fasten off (8 x dc3tog, 8 x ch-2 spaces)
- 3 – New colour: 3sc along the sides. 2sc, ch2, 2sc at corners. (4 x 3sc groups, 4 x 2sc,ch2,2sc groups)
- 4 – Ch5 and then sl st over each 3sc groups. Ch4, sl st into ch-2 space, ch 4 at corners (8 x ch-4 spaces, 4 x ch-5 spaces)
- 5 – 5sc in ch-5 spaces and 4sc in ch-4 spaces (8 x 4sc groups, 4 x 5sc groups)
- 6 -Sl st into 3rd dc in 5sc group, ch5 then dc,ch3,dc at corners, ch 5. Repeat 3 more times. Fasten off (8 x ch-5 spaces, 4 x dc, ch3, dc groups)
- 7 – New Colour: 2dc, ch1, 2dc at corners and 6dc into each ch-5 space. Fasten off. (4 x 2dc, ch1, 2dc groups, 8 x 6dc groups)
- 8 – New Colour: 2dc, 1ch, 2dc into each corner and 1dc into each of the 16 stitches along the sides. Fasten off.(4 x 2dc, ch1, 2dc groups, 16 dcs along each side) Fasten off.