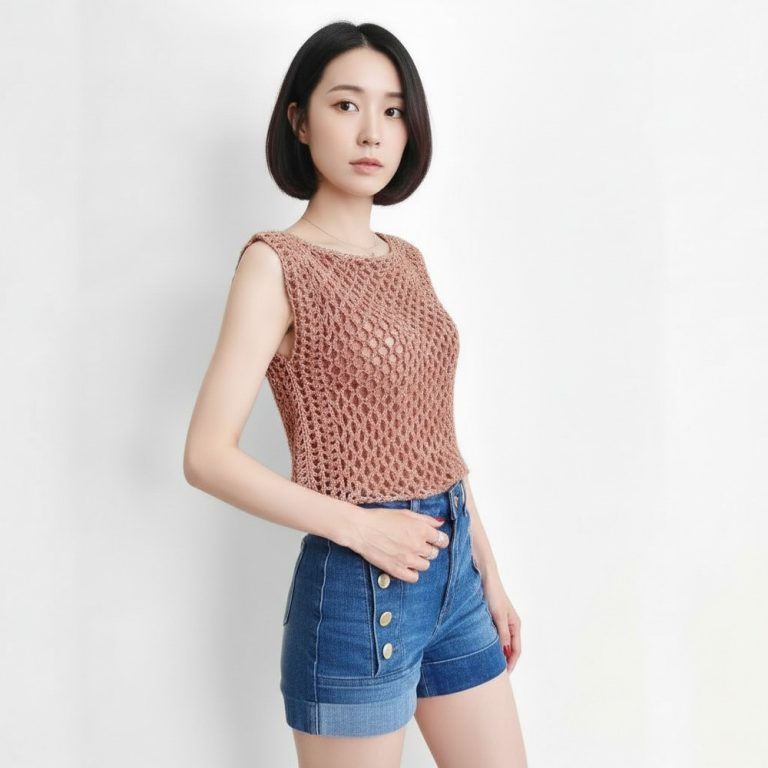
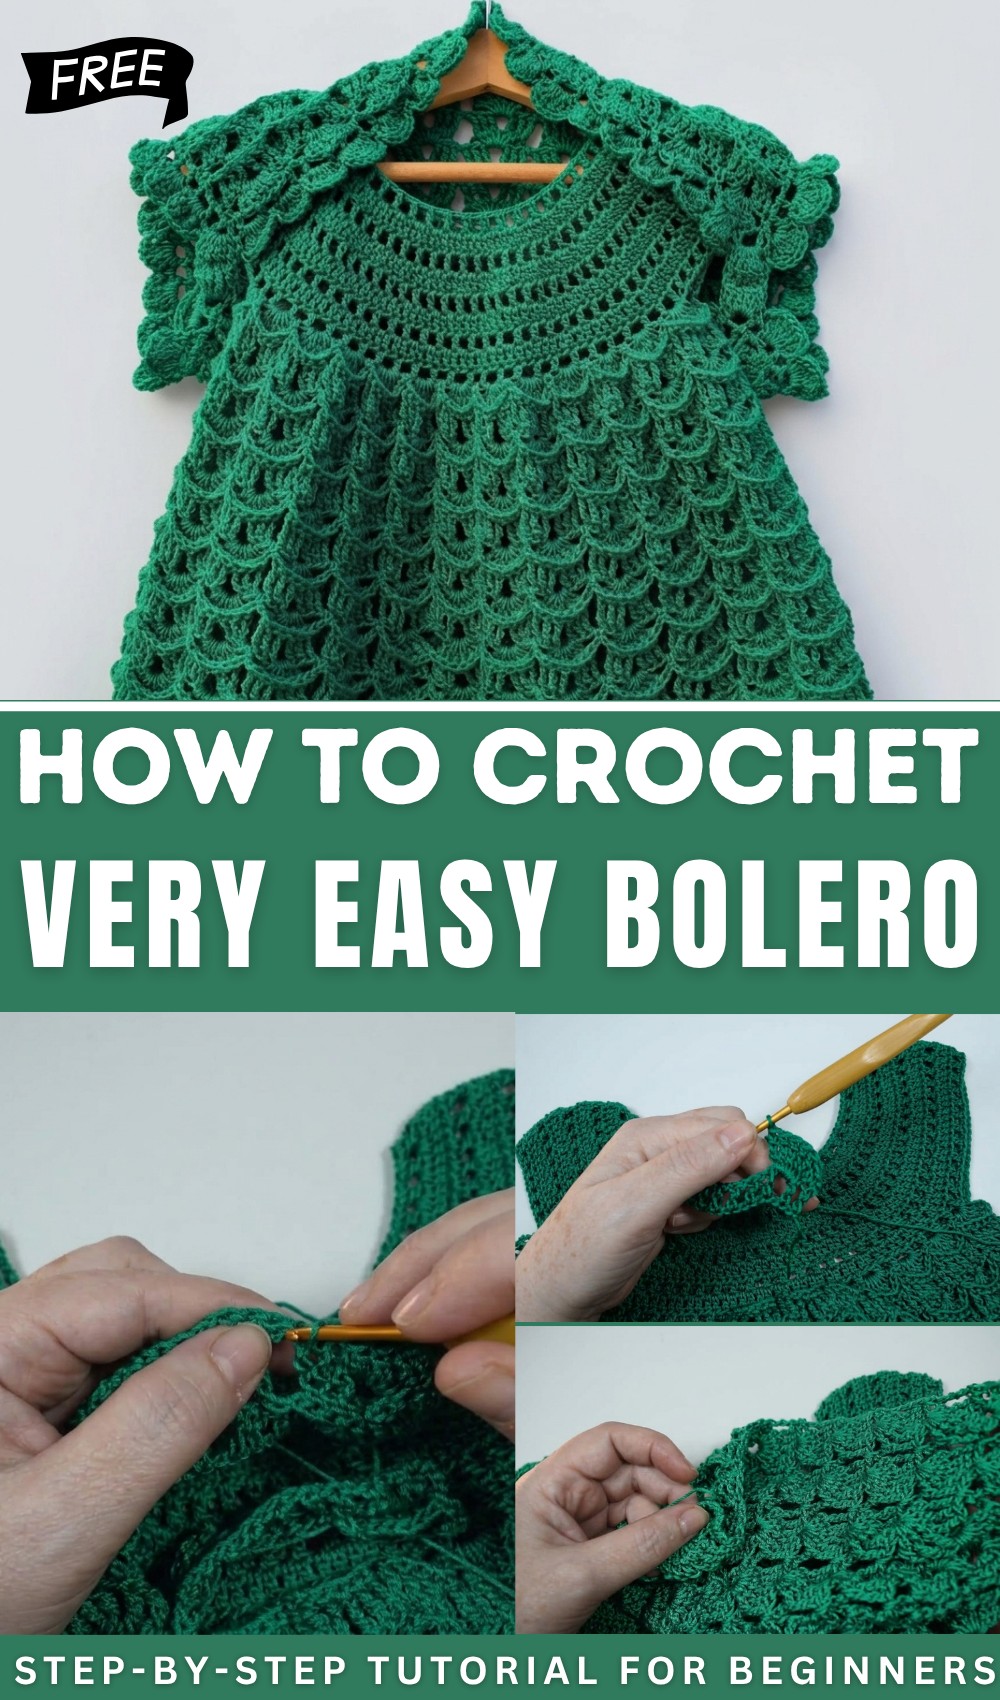
Free Crochet Bolero Pattern – Step-by-Step Guide
Let your outfits shine with this free crochet bolero pattern that offers comfort style and lovely handmade touch for any occasion with ease.
A soft and bright piece slips over the shoulders bringing warmth and style to every outfit. Light in weight it sits gently with beautiful open stitches forming a lovely shape that covers your arms but lets air flow freely. Using the crochet bolero pattern each person can make something special without struggling—just follow simple steps and see the yarn become a wonderful cover for your chest and back.
Stylish Crochet Bolero Pattern – Totally Free
This kind of clothing is helpful on cool days or when you want to add color and detail without making things heavy. It can be worn with dresses tops or even over t-shirts to make clothes feel new again. Made in any color you like the bolero keeps its shape and makes the person wearing it stand out in any group. This pattern is not hard everyone can learn and use it and the finished piece makes you feel proud and happy wherever you go.
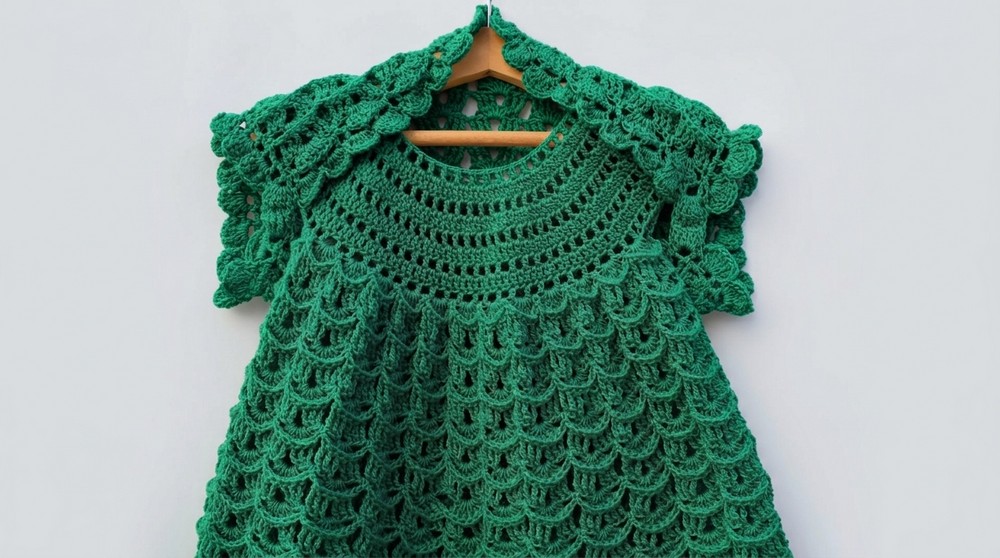
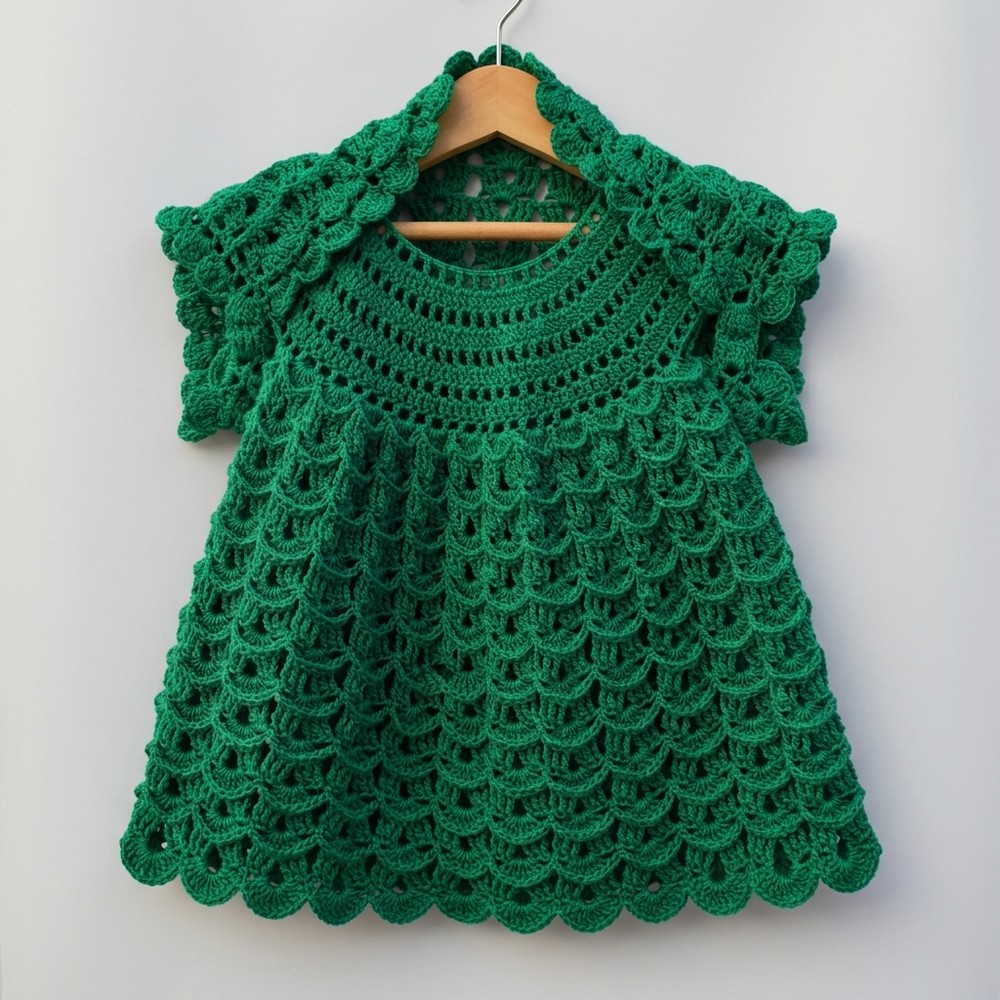
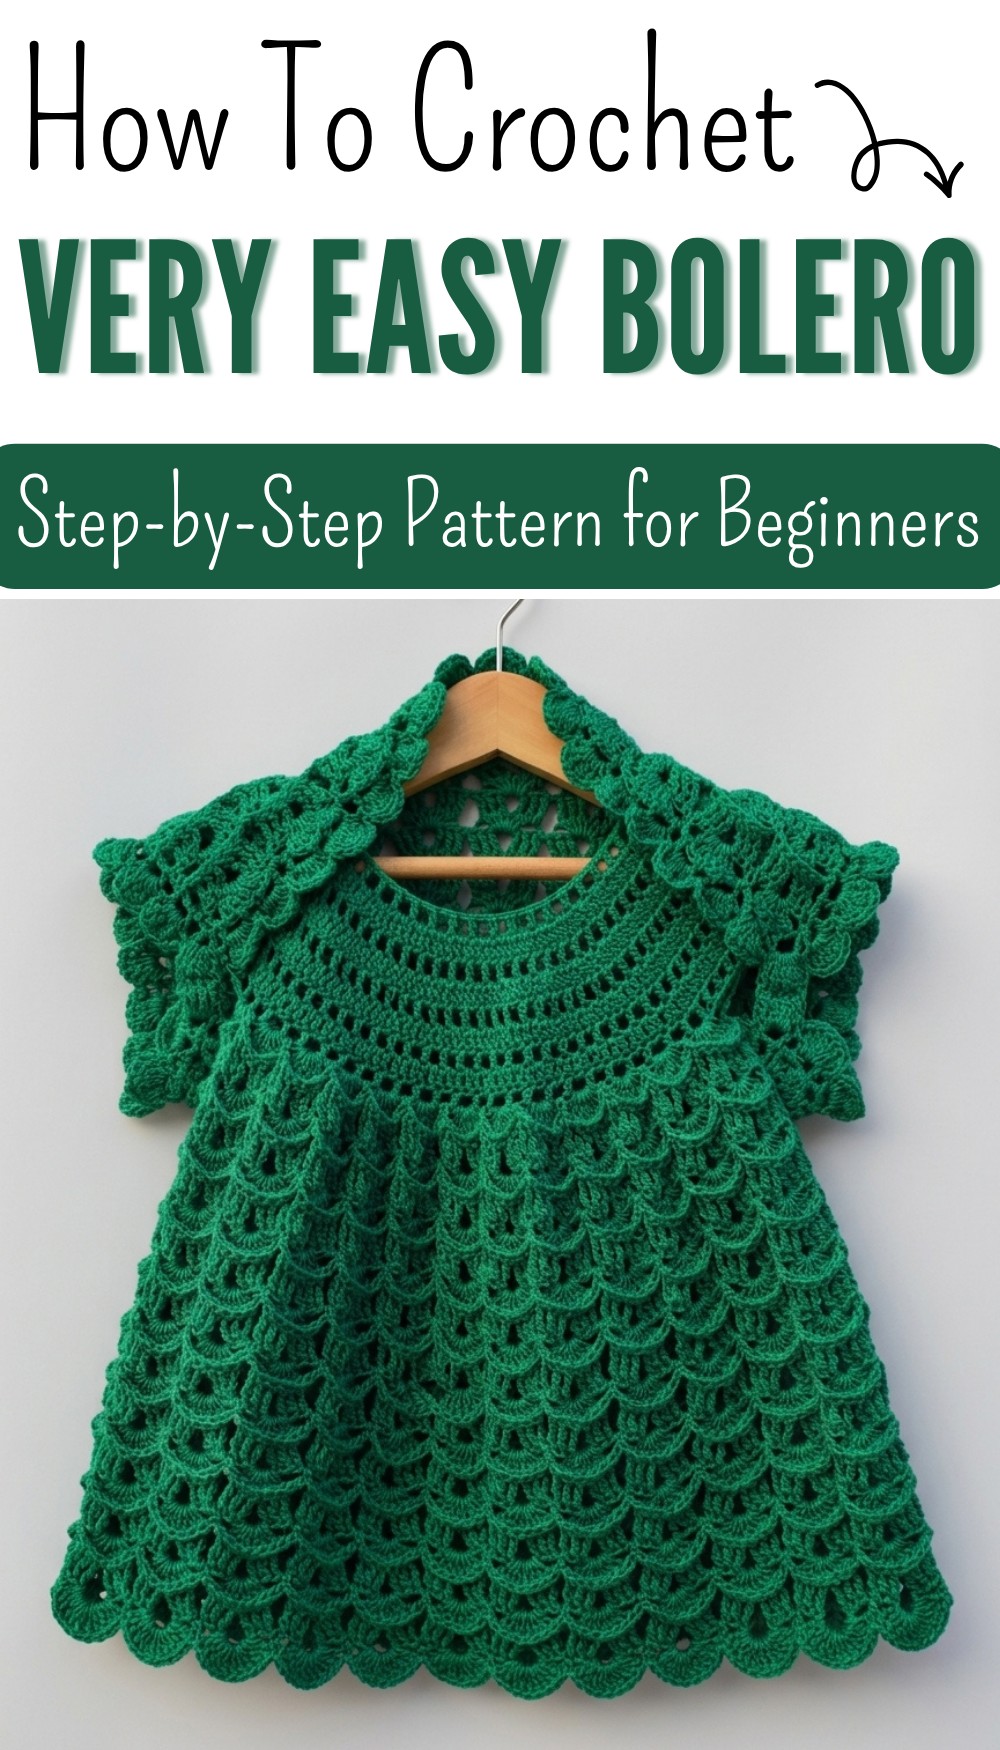
Easy Crochet Bolero (Bullfighter) Pattern
Materials
- Yarn: Light or DK-weight yarn of your choice
- Hook: 3.0–3.5 mm (or size to achieve preferred drape and size)
- Yarn needle: for seaming and weaving in ends
- Measuring tape
- Scissors
- Stitch markers (optional, to mark shoulders or sides)
Key Abbreviations (US Terms)
- ch = chain
- sc = single crochet
- dc = double crochet
- sl st = slip stitch
- st(s) = stitch(es)
- sk = skip
Special Notes
- The bolero is constructed as a single rectangle worked side-to-side, then folded and seamed to form armholes.
- The length of your foundation chain determines the width (shoulder to shoulder or sleeve-to-sleeve if sleeves are added).
- To size:
- Sleeveless: Measure across back, shoulder to shoulder.
- Short/long sleeve: Measure desired arm span (e.g., wrist to wrist).
- The rectangle is worked in alternating rows of mesh and shell (fan) stitch.
- After forming the rectangle, sleeves and finishing edging (ruffle) are added around the outer edges.
- All measurements can be adjusted for fit; sample is approx. 29cm wide by 24cm long when folded.
Step-by-Step Pattern
1. Main Rectangle
Foundation Chain
- Measure: For sleeveless, measure shoulder to shoulder across the back (e.g., 29 cm or 11.5 in). For sleeves, measure wrist to wrist.
- Ch the number to reach this length; sample: ch 70.
- Adjust the chain number to match your measurement as needed.
Row 1: Mesh Row (Eyelet)
- Ch 4 (counts as 1 dc + 1 ch), *sk 1 ch, dc in next ch, ch 1; repeat from * across.
- You should end with a dc in the last ch. Turn.
Row 2: Fan Row
- Ch 1, sc in first dc,
- (In next ch-1 sp) work 6 dc (shell/fan made); ch 1, sk next dc, sc into next ch-1 sp, repeat from * to * across.
- Always end with sc in the last st or space. Turn.
Row 3: Mesh Row
- Ch 4, *sk 1, dc in next dc (or shell stitch), ch 1; repeat from * across. Turn.
Row 4: Fan Row
- Ch 1, sc in first dc or space,
- (In next ch-1 sp) work 6 dc; ch 1, sc in next ch-1 sp, repeat from * to * across.
- End with sc. Turn.
Repeat Rows 3 and 4
- Alternate mesh rows and fan rows, continuing until you reach the desired length (from shoulder to below armhole; sample: each side is 12 cm for a total of 24 cm when folded).
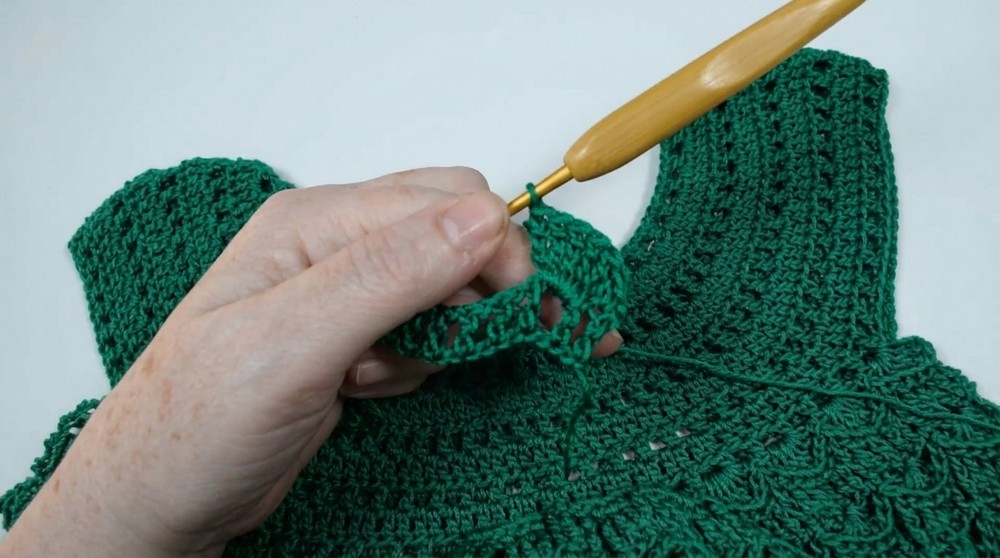
2. Finishing Body
- When rectangle is the desired length, fold in half so short edges align.
- Seam sides up from corners toward the fold, leaving armholes (about 12 cm or as desired) open.
- Use slip stitch or whipstitch with yarn needle.
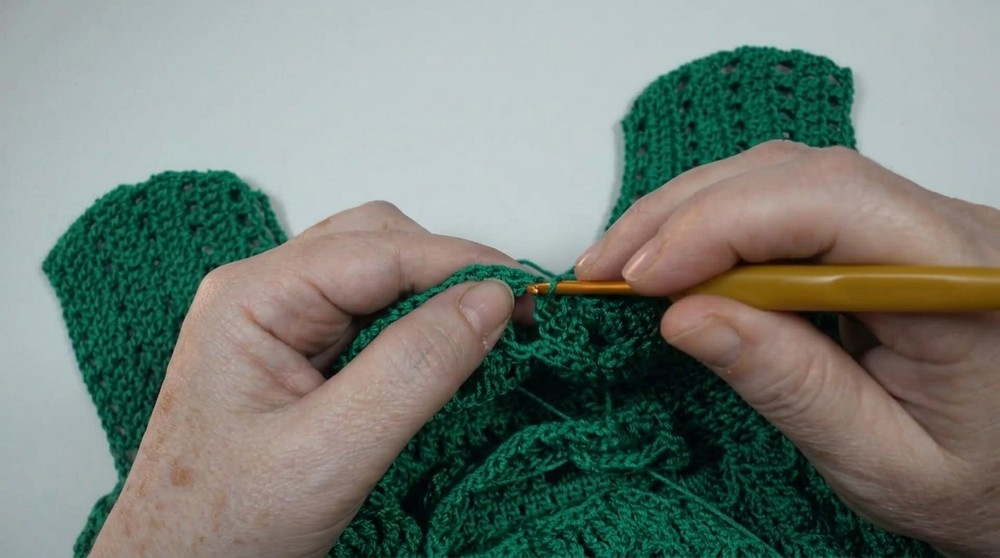
3. Edging (Ruffle)
A. First round (Mesh/Net):
- Starting at one corner, attach yarn.
- Ch 4, sk 1, dc in next st, ch 1—work mesh pattern evenly around all edges (opening, neckline, and sleeves if worked), placing extra sts at corners for ease.
- At each corner: (dc, ch 1, dc) in corner st for a rounded finish.
- Join with sl st at end of round.
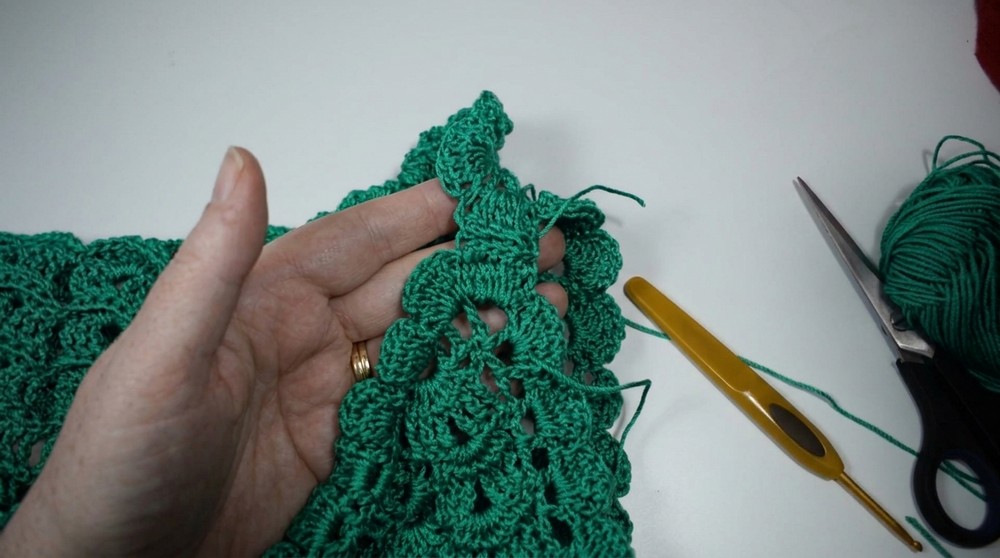
B. Second Round (Fan Ruffle):
- Attach yarn at any mesh space,
- Ch 1, sc in space, (6 dc in next ch-1 sp, sc in next ch-1 sp) repeat around the entire edge (do NOT skip any space).
- Join with sl st. Fasten off and weave in ends.
4. Optional: Sleeves
- If longer sleeves are desired, add more rounds (repeat mesh and fan rows as above) along sleeve edges before the ruffle.
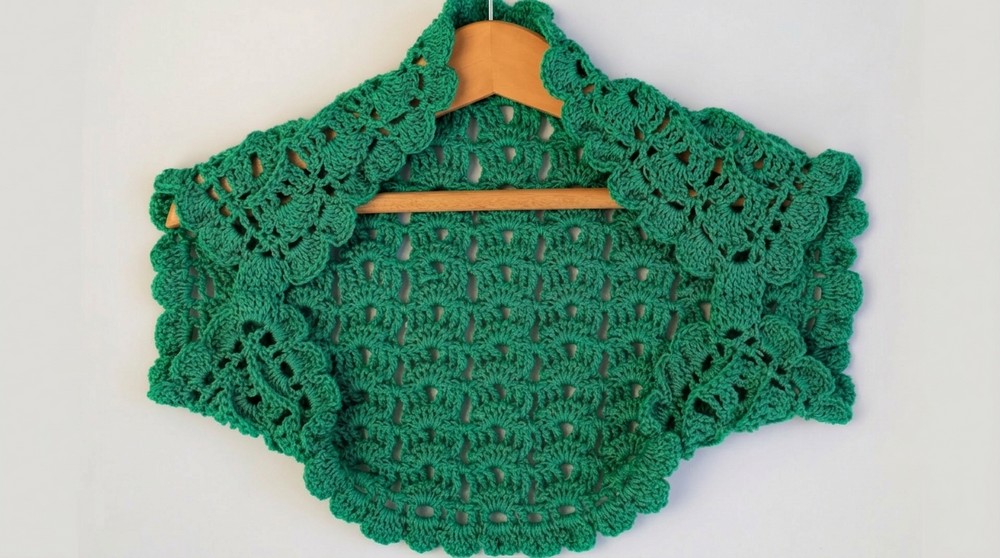
Conclusion
This bolero (bullfighter) pattern is accessible for all skill levels and can be customized in both length and width, as well as with or without sleeves. It creates an elegant accent for dresses or tops and is an ideal project for trying out simple mesh and fan stitches.
Pattern Correction & Tips
Pattern Correction:
- Work mesh/eyelet rows with ch-1 between each dc, skipping one st between each dc.
- Work fan/ruffle rounds with 6 dc per ch-1 space or as fits your tension.
Tips:
- Measure on your body or on the garment to ensure it’s the right length and width.
- Adjust the armhole seam length for more or less sleeve opening.
- To ease the corners and avoid puckering on the ruffle, add (dc, ch, dc) at each corner.
- This bolero can easily be enlarged or made more fitted by adjusting the initial chain and number of rows.