Free Crochet Bustier Pattern With Beautiful Floral Design to Try

Turn your wardrobe with a free crochet floral bustier pattern perfect for creating cozy, eye-catching tops that blend creativity and floral elegance.
Bright and elegant summer wear can truly transform your wardrobe, especially when featuring delicate floral details that capture the essence of the season. On the magic knots channel, a beautiful guide reveals how to create a stylish piece that combines charm and grace with every stitch. This top offers a fresh and vibrant look inspired by nature’s blooms.
Free and Easy Crochet Bustier Pattern with Floral Details
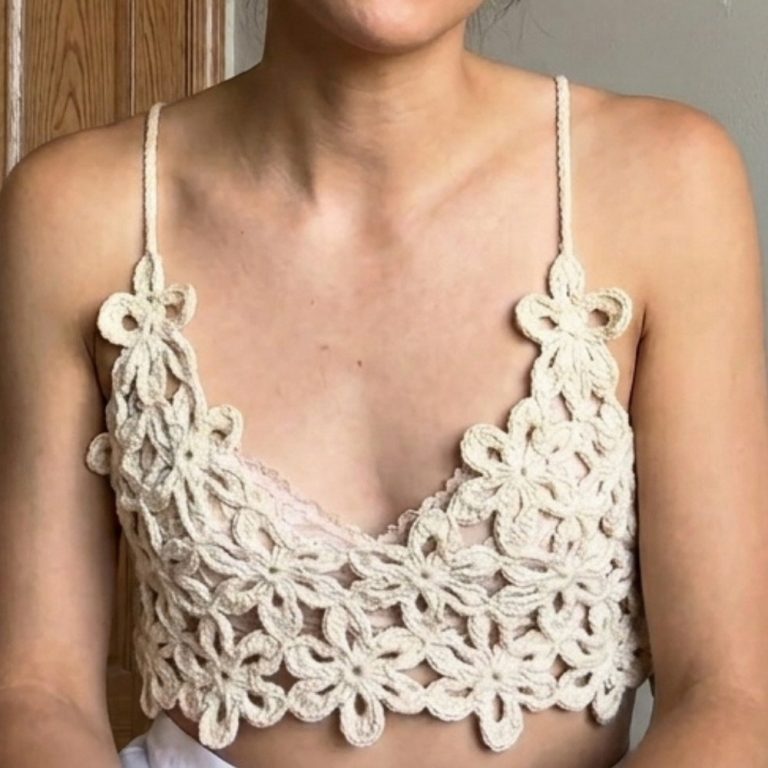
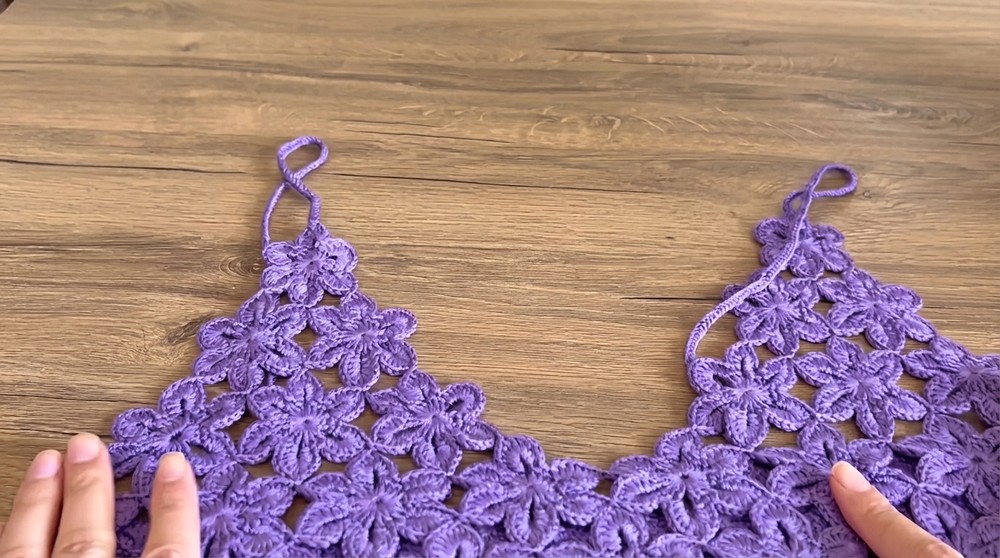
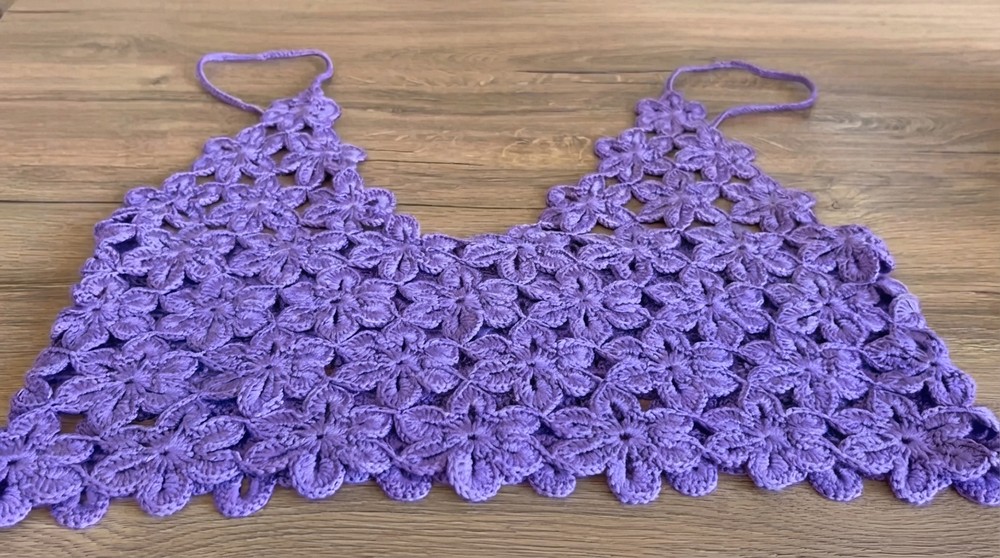
The Free crochet floral bustier pattern showcases a stunning design made of connected flower motifs that shape a fitted, flattering top. The elegant silhouette highlights the bust area, enhanced by intricate floral elements that add a feminine touch. This light and eye-catching garment is perfect for sunny outdoor events or casual hangouts. Beyond functionality, the floral details bring decorative charm to any outfit, making it a true statement piece.
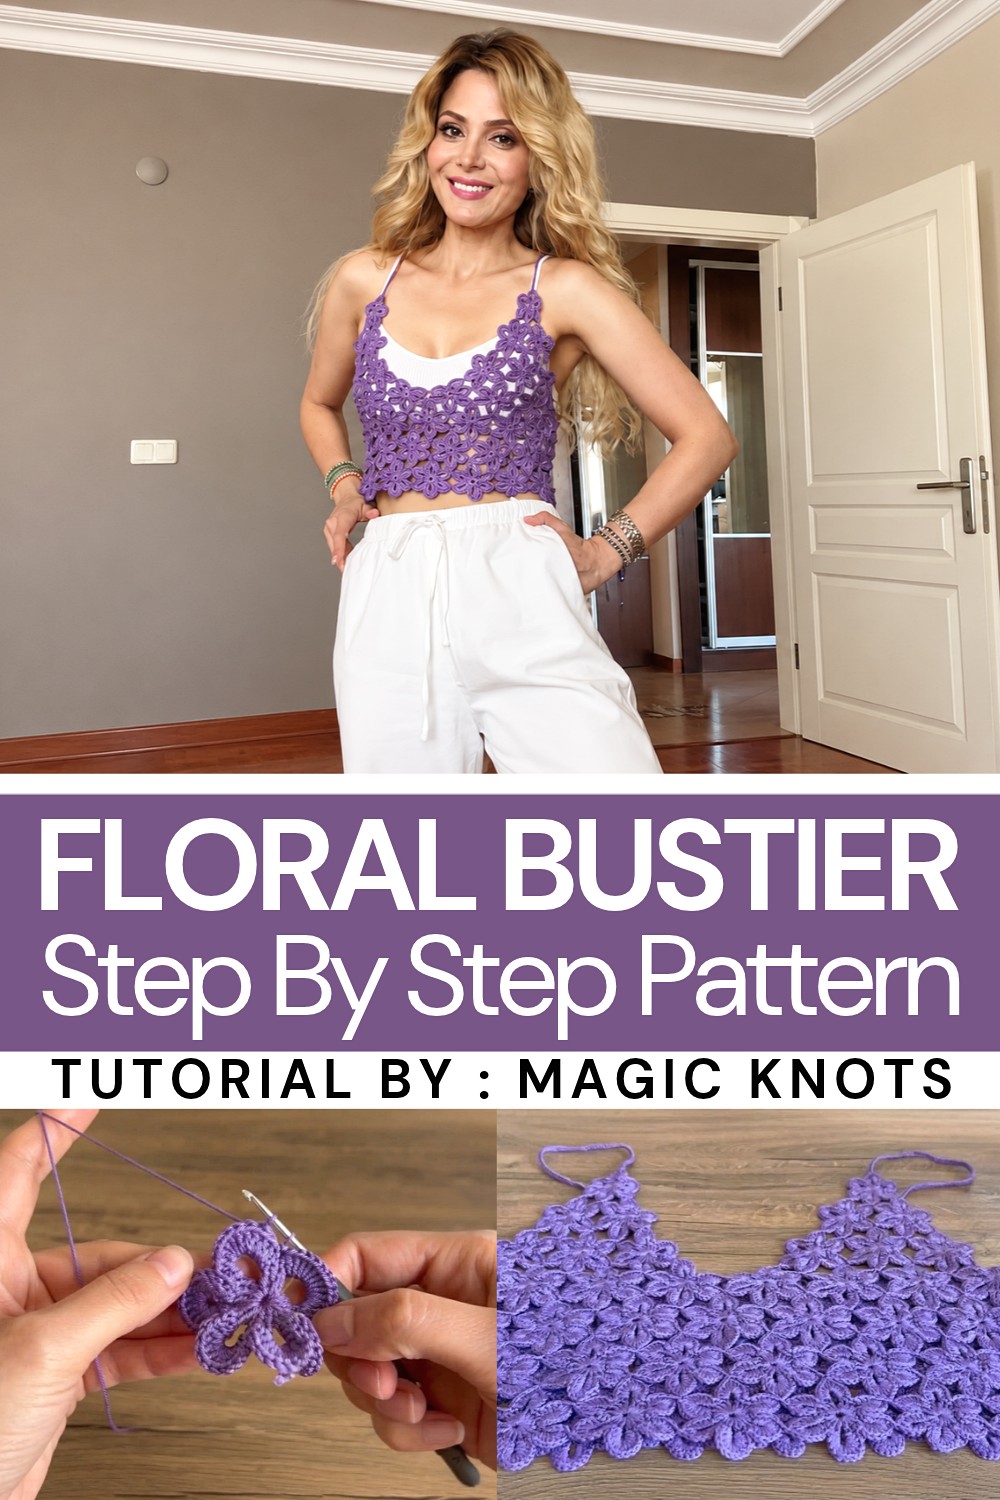
More than just stylish, this bustier doubles as a thoughtful and unique gift for those who appreciate handmade clothing with character. Its combination of comfort and fashion allows the wearer to feel confident and radiant. Suitable for special occasions or everyday wear, this floral creation invites compliments and adds a joyful splash of color wherever it’s worn.
For fans of clothing that combines personality and delicate artistry, the Free crochet floral bustier pattern presents a wonderful opportunity to crochet something truly special. Visit the magic knots channel to explore the free pattern and start creating this beautiful, colorful addition to your wardrobe today.
Floral Crochet Bustier Pattern
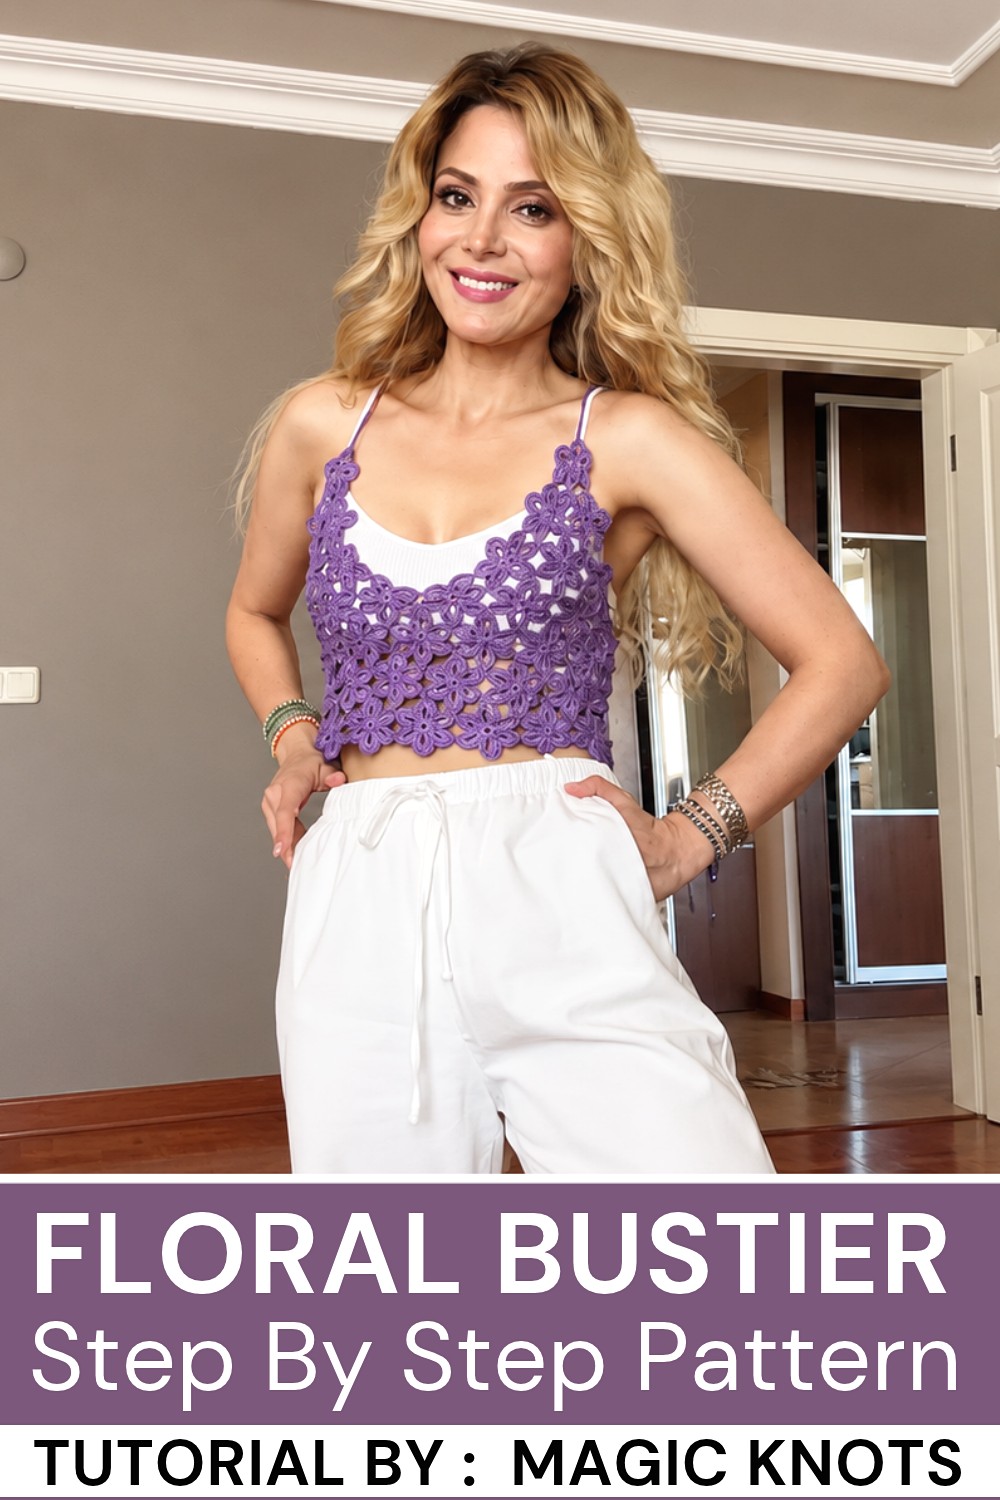
This floral crochet bustier is a chic and versatile garment crafted by joining intricate crochet motifs. This lightweight and breathable design is perfect for summer days or festive occasions. Each motif is worked individually and seamlessly assembled to form a fitted and flattering bustier. By incorporating breast cups and reinforced straps, this project blends elegance with functionality.

Skill Level
Intermediate
This pattern is created for crocheters who are familiar with basic stitches, working in the round, and joining motifs. Intermediate skills in tension control, motif alignment, and creating reinforced straps are necessary for this project.
Materials Needed
- Yarn:
- Cotton yarn is highly recommended for this project due to its soft texture, durability, and ability to retain shape. Avoid acrylic yarns as they tend to stretch and lose structure over time.
- Hook:
- 2mm crochet hook, ideal for delicate stitches and sharp motif details.
- Additional Tools:
- Stitch markers or safety pins for securing and aligning motifs during assembly.
- Scissors for trimming yarn ends.
- Measuring tape for accurate dimensions.
Special Stitches Used
- Magic Ring:
- Form a loop by wrapping the yarn around your fingers. Insert the hook into the loop, yarn over, and pull up a loop to secure. Work the prescribed number of stitches into the loop. Tighten the loop by pulling the yarn’s loose end.
- Double Crochet (Dc):
- Yarn over, insert the hook into the stitch, yarn over again and pull through the stitch (3 loops on hook). Yarn over, pull through the first 2 loops, yarn over again, and pull through the remaining 2 loops.
- Reinforced Chain (for straps):
- Ch 1, insert the hook into the front loop of the previous chain, yarn over, pull through, and complete as a slip stitch. Repeat to create a durable, sturdy strap.
Stitch Abbreviations
- Ch: Chain
- Dc: Double Crochet
- Sc: Single Crochet
- Sl St: Slip Stitch
Useful Tips
- Choose Cotton Yarn: Select cotton yarn for a structure that holds shape and resists stretching. This ensures the bustier is long-lasting and comfortable.
- Keep Tension Consistent: Maintain an even tension when creating motifs to ensure they are uniform in size and shape.
- Align During Assembly: Use stitch markers or pins to secure motifs during assembly. This keeps everything aligned and prevents gaps.
- Try As You Go: Periodically try on the bustier using temporary pins to assess fit, especially before attaching straps. Adjust the number of motifs if necessary.
- Reinforcing Straps: Use a durable stitch, like the reinforced chain, to prevent sagging over time.
- Customization Options: You can increase or decrease motif rows in the band or create deeper cups for larger sizes if needed.
Pattern Instructions
Part 1: Motif Creation
Round 1:
- Begin with a magic ring.
- Ch 4 and Sl St into the first chain to form a small circle.
- Ch 3 (counts as the first Dc), then work 2 Dc into the ring.
- Ch 6, then work 3 Dc into the ring.
- Repeat the sequence Ch 6, 3 Dc in the ring until there are 6 petal groups in total.
- Finish the round with a Sl St to the starting Ch 3 to close the round.
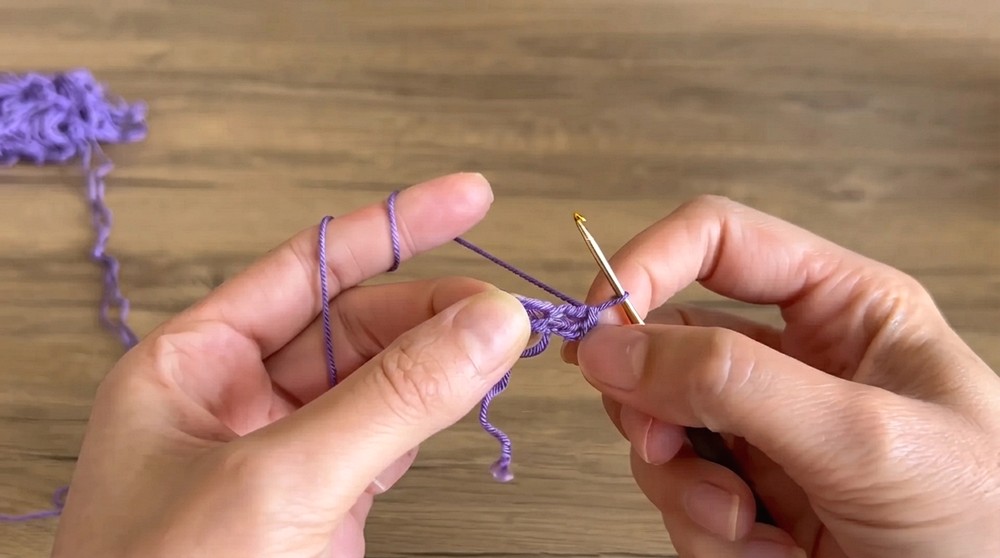
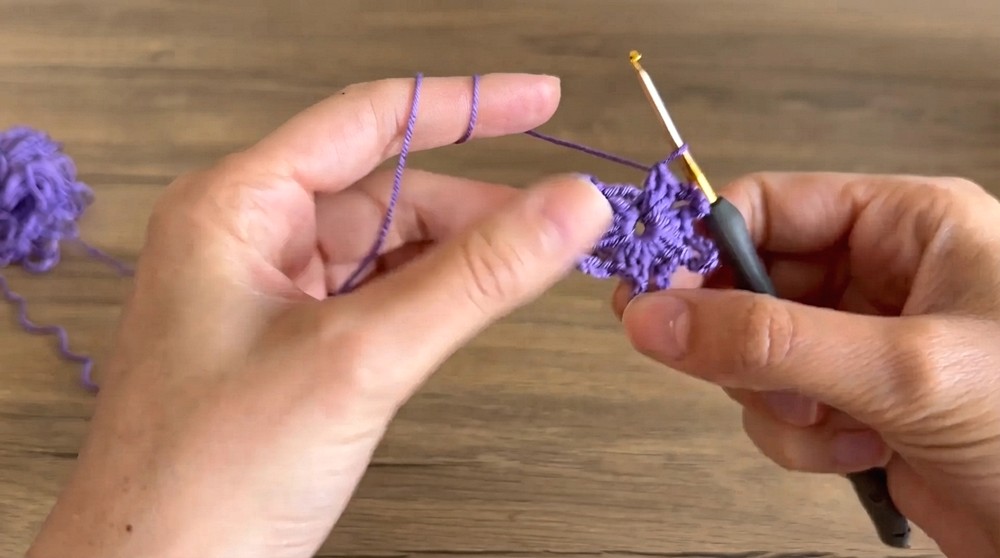
Round 2:
- Work into each 6-chain loop from the previous round:
- Fill each loop with 12 Dc stitches to create fuller petals.
- To separate the petals, place 1 Sc between each petal group.
- Fasten off the yarn when all petals have been completed.
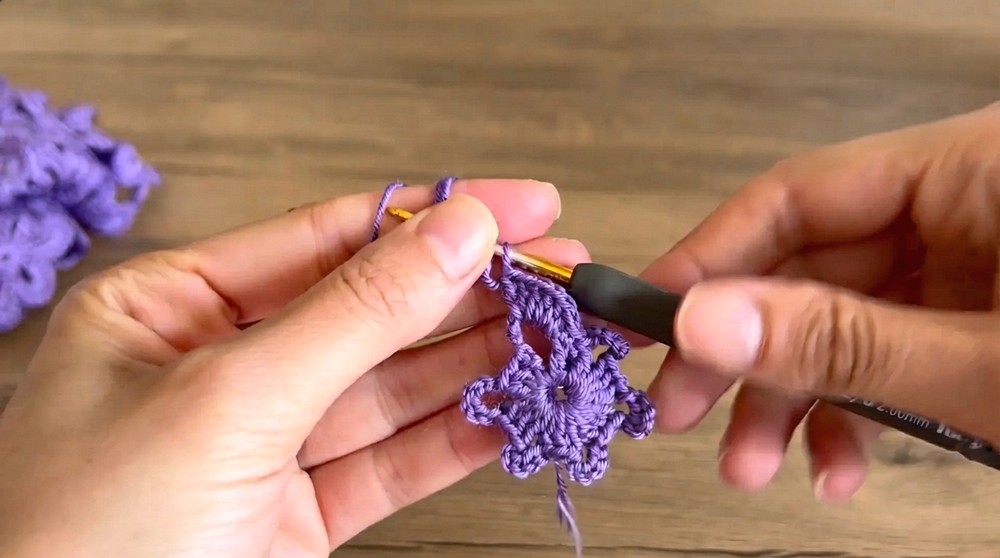
Part 2: Joining Motifs
- Once you’ve completed one full motif (Rounds 1 and 2), subsequent motifs must be joined during their creation.
- For joining:
- Begin by working Round 1 of the second motif as described.
- Start Round 2 as before.
- When working the 12 Dc stitches in a loop, replace the center 2 Dc stitches with Ch 1, Sl St into the adjacent motif petal, and Ch 1.
- Continue filling the rest of the loop with Dc stitches to complete the petal.
- Repeat this process for all petals that need to connect to adjacent motifs. The motifs will naturally interlock into a grid-like structure.
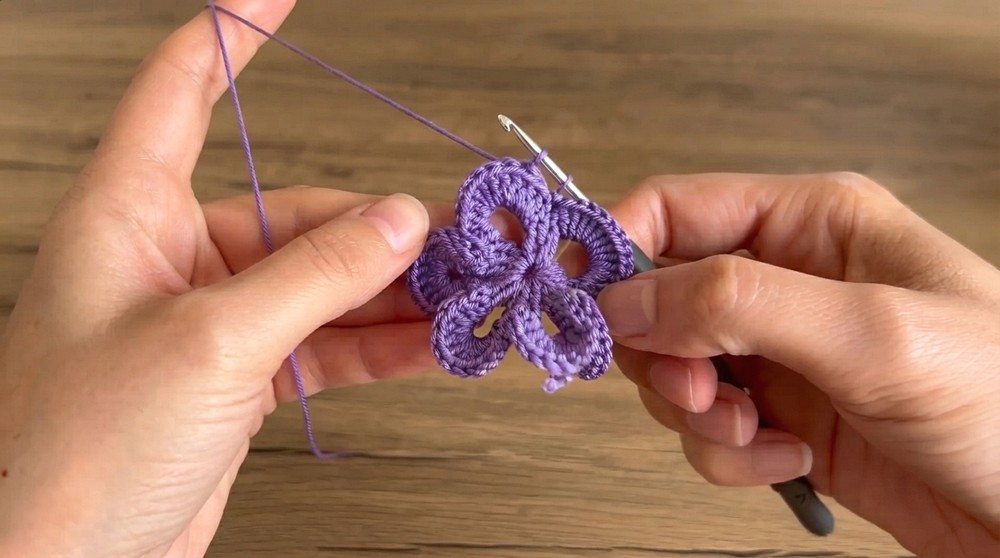
Part 3: Bustier Assembly
Base Rows:
- Create the base band of the bustier by working 3 rows of 14 motifs.
- Join each motif row by row using the joining method from Part 2. Ensure all motifs are securely attached for a seamless band.
Breast Cups:
- Form the cups above the band by working triangular arrangements on both sides.
- For each cup:
- First row: Join 3 motifs above the top row of the band.
- Second row: Attach 2 motifs, joining them to the top corners of the previous row’s motifs.
- Final row: Join 1 motif to the center point of the two motifs below.
- This triangular arrangement naturally forms the angle and fit for the breast cups.
Side Fit Customization:
- Adjust the number of motifs in the band and cups to accommodate individual sizing.
Part 4: Strap Construction
Create the Straps:
- Attach yarn to the top outer corner of one breast cup.
- Use a reinforced chain stitch to construct a strong strap:
- Ch 1, insert your hook into the front loop of the last chain, and pull through as described in the special stitches section.
- Repeat until the strap reaches the desired length.
Attach Straps:
- Secure the straps to the corresponding positions on the back of the bustier using slip stitches.
- Use temporary pins or stitch markers to test the strap position and fit before finalizing.
Part 5: Final Assembly
- Join the completed breast cups to the top of the band. Double-check alignment to avoid uneven placement.
- Work through all motifs for any loose gaps and add stitches where required to secure connections.
- Tie off and weave in all loose threads for a neat finish.
- Gently block the bustier to straighten motifs and refine the shape.
Final Motif Count
- Band: 14 motifs x 3 rows.
- Breast Cups: 3 motifs in the first row, 2 in the second, and 1 in the third on each side.
- Strap Length: Adjustable according to individual fit.
Conclusion
This floral crochet bustier is a beautiful and customizable handmade garment designed to celebrate your creativity and craftsmanship. The project involves constructing individual motifs, carefully joining them, and forming structured yet elegant shapes. By following this intermediate-level pattern and tips, you can create a flattering and durable bustier that is perfect for warm weather or special occasions.